How to Revive St. Augustine Grass in Florida

How to Revive St. Augustine Grass in Florida

A St. Augustine lawn can go from thick and green to thin, yellow, and patchy faster than most homeowners expect. Summer heat, sandy soil, heavy rain, irrigation problems, pests, and mowing mistakes all put pressure on this popular Florida turf. The good news is that knowing how to revive St. Augustine grass starts with identifying why it is struggling instead of treating every brown spot the same way.

Start by Finding Out What Is Hurting the Lawn

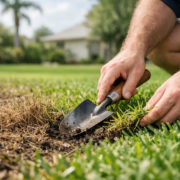
St. Augustine grass spreads through above-ground runners called stolons. If those runners are green and flexible near the soil, the lawn may be stressed but still recoverable. If the runners are brittle, brown throughout, and pull up easily with no healthy roots, parts of the lawn may need new sod or plugs.

Look closely at the pattern of damage. A lawn that is pale or thin across the entire yard often points to watering, nutrient, soil, or mowing issues. Round brown patches that keep enlarging can indicate a fungal disease, especially during humid weather. Irregular dead areas near sidewalks, driveways, or pet spots may be caused by heat reflection, salt, foot traffic, or chemical damage.

In Northeast Florida, chinch bugs are another common reason for declining St. Augustine. They often cause expanding yellow-to-brown areas in sunny portions of the yard, and the grass may look drought-stressed even when it has been watered. A professional inspection can separate pest damage from drought or disease, which matters because the wrong treatment can make the problem worse.

How to Revive St. Augustine Grass With Better Watering

A thirsty lawn is not always a lawn that needs daily watering. Frequent light watering encourages shallow roots, and shallow roots struggle when Florida heat arrives. Instead, water deeply enough to moisten the root zone, then allow the surface to begin drying before the next cycle.

Most established St. Augustine lawns need about an inch of water per week from rainfall and irrigation combined. In hot, dry stretches, that may mean two longer watering cycles each week. Sandy soils drain quickly, so every yard is different. A lawn with shade, heavier soil, or recent rainfall will need less water than an open, sunny lawn near the coast.

Water early in the morning whenever possible. Evening watering leaves the blades wet overnight and creates a better environment for fungal problems. If your lawn is dry in some places and soggy in others, do not assume the grass is the issue. Broken sprinkler heads, clogged nozzles, poor coverage, or incorrect timer settings are often the real problem.

A simple catch-can test can reveal whether every zone is delivering water evenly. Place a few straight-sided containers around the lawn during a watering cycle and compare the amounts collected. Large differences are a clear sign that the irrigation system needs adjustment or repair.

Raise the Mowing Height and Protect the Blades

St. Augustine grass does not respond well to being cut short. A low mowing height exposes the soil to more heat, weakens the root system, and gives weeds a chance to move in. For most Florida lawns, keep St. Augustine around 3.5 to 4 inches tall, adjusting slightly for your specific variety and growing conditions.

Never remove more than one-third of the grass blade in a single mowing. If the lawn is overgrown after a rainy week, raise the mower and bring it down gradually over the next few cuts. Scalping an already stressed lawn can turn a manageable recovery into a larger sod replacement job.

Sharp mower blades are just as important. Dull blades tear grass rather than making a clean cut, leaving brown tips across the yard and increasing stress on the turf. Regular mowing with clean, sharp equipment helps the lawn grow more evenly and keeps its color looking healthier.

Feed the Lawn Only When It Can Use the Nutrients

Fertilizer is helpful when St. Augustine is actively growing, but it is not a cure for every lawn problem. Applying fertilizer to grass that is drought-stressed, diseased, or damaged by insects can push weak growth and create more trouble. First correct the cause of the stress, then use a lawn-appropriate fertilizer program based on the season and your property’s needs.

Florida’s sandy soils do not hold nutrients for long, so St. Augustine often benefits from properly timed applications during the active growing season. Iron can also improve color when a lawn is pale but otherwise healthy. However, green color alone does not mean the grass has a strong root system. Overfertilizing can lead to excessive growth, thatch buildup, nutrient runoff, and more mowing.

Local fertilizer rules and seasonal conditions can affect what should be applied and when. A customized plan based on your grass, soil, irrigation, and shade level is more dependable than applying the same product at the same rate to every lawn.

Address Thatch, Compaction, and Soil Problems Carefully

A little thatch is normal in St. Augustine grass. A thick, spongy layer between the green blades and soil is not. When thatch becomes excessive, water, air, and nutrients have a harder time reaching the roots. The lawn may feel soft underfoot, dry out quickly, and become more vulnerable to insects and disease.

Avoid aggressive dethatching with a power rake. St. Augustine is more easily damaged than some other turf types, and harsh removal can tear up its runners. In many cases, correcting mowing and fertilization practices is the best long-term way to reduce thatch. Core aeration may help compacted lawns, especially where foot traffic, heavy equipment, or dense soil prevents water from soaking in. Timing and technique matter, because aerating a weak or diseased lawn can add stress.

If water runs off instead of soaking in, or if the yard stays wet long after rain, drainage may be part of the problem. Low spots, compacted areas, and irrigation leaks all affect root health. A healthy lawn needs moisture, but it also needs oxygen in the soil.

Control Weeds, Pests, and Disease Without Guesswork

Weeds are usually a symptom of thin turf, not the original cause. They take advantage of bare soil, low mowing heights, weak roots, and uneven watering. Improving lawn density is the strongest long-term weed defense, but existing weeds may still need targeted treatment.

Be careful with herbicides, particularly during hot weather or when the lawn is already struggling. Some products can injure St. Augustine grass if they are not labeled for it or applied incorrectly. The same goes for insect and disease treatments. Chinch bugs, grubs, sod webworms, brown patch, and gray leaf spot require different solutions.

When a brown area is spreading, do not keep adding water or fertilizer hoping it will green up. Take a closer look before acting. Fast diagnosis protects the healthy areas of the yard and avoids spending money on treatments that do not fit the problem.

Repair Bare Areas With Sod or Plugs

St. Augustine grass is typically repaired with sod or plugs, not seed. For small bare spots, healthy plugs can spread into the surrounding area when they receive consistent moisture and proper mowing. Larger damaged sections usually look better and establish faster with fresh, matching sod.

Prepare the area first by removing dead material, correcting soil or drainage issues, and leveling the ground. New sod needs frequent watering at the beginning, but it should not stay saturated. Once the roots begin to anchor, transition to deeper, less frequent watering so the grass develops a stronger root system.

Recovery is rarely overnight. A stressed lawn may show improved color within a few weeks after its watering and mowing issues are corrected, while thin sections can take a full growing season to fill in. Dead areas caused by pests, disease, shade, or irrigation failure will not recover until the underlying issue is fixed.

For homeowners who want clear answers and a practical plan, American Blade Lawn Care can evaluate the lawn, irrigation, mowing needs, and damaged areas together. The goal is not to sell a one-size-fits-all treatment. It is to give your St. Augustine grass the conditions it needs to grow thick again and keep your property looking cared for.

What Causes Brown Lawn Spots in Florida?

What Causes Brown Lawn Spots in Florida?

A brown patch in an otherwise green St. Augustine lawn is rarely just an appearance problem. In Northeast Florida, heat, humid nights, sandy soil, heavy rain, and irrigation demands can all stress turf quickly. If you are asking what causes brown lawn spots, the honest answer is that the pattern, timing, and location of the damage matter as much as the color itself.

The wrong fix can make the problem worse. Extra water may help drought stress but feed a fungus. More fertilizer may help a thin lawn but burn already stressed grass. A close look at the patch before treating it can save time, money, and a larger repair later.

What Causes Brown Lawn Spots in St. Augustine Lawns?

Brown areas generally come from one of five sources: watering problems, lawn disease, insects, physical damage, or weak growing conditions below the surface. Florida lawns often deal with more than one at the same time. For example, an irrigation head that misses one area can weaken the grass, then chinch bugs or disease move into that stressed section.

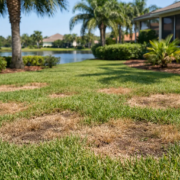
Start by looking at the shape of the patch. A dry, irregular area near pavement or a sprinkler head points toward watering or heat stress. A circular patch that expands after wet, humid weather may point to fungus. Brown grass that pulls up easily or has damaged roots deserves a closer inspection for insects, disease, or poor drainage.

Uneven Watering and Irrigation Problems

Irrigation issues are among the most common causes of brown spots in Florida yards. Sandy soil drains fast, and St. Augustine grass can show drought stress quickly in hot weather. You may notice folded or blue-gray blades before the lawn turns brown.

Still, running sprinklers longer is not always the answer. Broken heads, clogged nozzles, poor sprinkler coverage, leaks, and incorrect timer settings can leave one part of the yard thirsty while soaking another. Overwatered turf can develop shallow roots and become more vulnerable to fungal disease.

Check whether the brown area lines up with the reach of a sprinkler zone. Run that zone during daylight and watch for dry gaps, blocked spray patterns, heads watering the sidewalk instead of the grass, or low pressure. Early-morning watering is usually the better choice because grass blades have time to dry after sunrise. Evening watering can leave moisture on the lawn overnight, creating favorable conditions for disease.

Fungal Disease After Heat and Rain

Florida’s warm, humid weather gives lawn fungi plenty of opportunity. Large patch, sometimes called brown patch, is common in cooler, wet periods and may create expanding rings or irregular circular areas with a darker edge. During hotter months, gray leaf spot and other fungal issues can thin or discolor St. Augustine grass, especially when the lawn stays wet for long stretches.

Disease is not always obvious from a distance. Look closely at the leaf blades and surrounding turf. You may see spots, a tan or gray appearance, thinning growth, or a patch that seems to spread outward over several days. Wet weather, excessive nitrogen fertilizer, heavy thatch, poor airflow, and frequent nighttime irrigation all increase the risk.

Fungicide may be appropriate in some cases, but it is not a cure for the conditions that started the problem. The lawn also needs better moisture management, proper mowing, and a fertilizer plan that fits the season and grass type. Treating every brown patch as fungus without diagnosing it first can waste money and leave the real problem untouched.

Chinch Bugs, Caterpillars, and Other Lawn Pests

Chinch bugs are a major concern for St. Augustine lawns in Florida. They feed by sucking moisture from grass blades and injecting toxins that make turf look dry, even when it has been watered. Damage often begins in sunny, hot areas, along driveways, sidewalks, and curbs, then expands in irregular patches.

A chinch bug problem can look a lot like drought stress. The difference is that water does not bring the grass back, and insects may be present near the transition between green and brown turf. Sod webworms can also cause patchy brown areas by feeding on grass blades, while grubs may cause turf to loosen because they damage the roots.

Pest treatment should match the pest and its life cycle. Applying a general product without confirming the issue can harm beneficial insects and may not stop the damage. A lawn professional can inspect the active edge of the patch, identify likely pest pressure, and recommend the right treatment rather than guessing.

Mowing Damage, Dull Blades, and Scalping

A lawn can turn brown simply because it was cut too short. Scalping is especially common when grass has grown too tall between cuts, the lawn is uneven, or a mower is set too low. The mower removes too much green tissue at once and exposes stems and soil. In strong Florida sun, that stressed area can brown quickly.

Dull mower blades are another overlooked cause. Instead of making a clean cut, they tear the grass blade, leaving ragged brown tips across the lawn. This can make a healthy lawn look faded and can create entry points for disease.

For St. Augustine grass, mowing height should support healthy roots and shade the soil. The ideal height depends on the variety, time of year, and site conditions, but consistently cutting too low is never a long-term answer. Regular mowing with sharp equipment gives the lawn a cleaner look and helps it recover from seasonal stress.

Pet Urine, Fertilizer Spills, and Chemical Damage

Small, sharply defined brown circles are often caused by concentrated salts or nitrogen. Dog urine is a familiar culprit, especially in the same areas of the yard. Fertilizer spills, improperly mixed weed control products, gasoline, cleaning chemicals, and pool water can create similar burn marks.

A brown spot with a dark green ring around it is a common sign of concentrated nitrogen, although it is not proof on its own. Diluting fresh pet urine with water can reduce damage, but repeatedly watering a spot without understanding the cause can create its own issues. For fertilizer or chemical damage, the best response depends on what was applied, how much reached the turf, and how recently it happened.

Compacted Soil, Shade, and Root Stress

Not every brown spot starts above ground. Compacted soil limits air and water movement around the roots. Thatch buildup can keep moisture and nutrients from reaching the soil where they are needed. In shady areas, St. Augustine may simply struggle to receive enough sunlight to maintain dense growth.

Drainage matters, too. A low spot that stays wet after rain can lose healthy roots even though the lawn is receiving plenty of water. Brown turf in these areas may be a sign that the soil is staying saturated, not dry. Aeration, drainage improvements, soil-focused care, and adjusted plant choices can make a bigger difference than repeated surface treatments.

How to Diagnose Brown Lawn Spots Before They Spread

Before applying anything, take a few minutes to inspect the lawn. This short process can narrow down the likely cause:

  • Check the irrigation zone that serves the brown area and look for missed coverage, leaks, or overspray.
  • Compare the patch with nearby green grass. Notice whether the transition is gradual, circular, sharply defined, or moving outward.
  • Inspect the leaf blades and roots. Spots on blades, chewed edges, loose turf, or blackened roots each tell a different story.
  • Think back over the past two weeks. Heavy rain, a fertilizer application, a mowing change, pet activity, or landscaping work can provide the missing clue.

Take photos every few days if the damage is changing. A patch that grows despite proper watering needs attention sooner rather than later. Dead turf does not always return on its own, and early action can prevent a small trouble spot from becoming a larger sod repair.

When Professional Lawn Care Makes Sense

A homeowner can often correct a blocked sprinkler head or raise a mower deck. But recurring brown spots, spreading patches, irrigation concerns, or widespread thinning usually call for a more complete evaluation. The visible damage may be only one part of the issue.

American Blade Lawn Care can assess the grass type, watering coverage, mowing conditions, pest pressure, and soil-related concerns affecting your property. From irrigation repair and recurring maintenance to targeted lawn treatments, the goal is to give your yard the care it actually needs instead of applying a one-size-fits-all fix.

A healthy Florida lawn is built through consistent attention, not a quick spray or a single heavy watering. When brown spots show up, treat them as a signal from the yard – then get the right diagnosis and a practical plan to bring the green back.

Why Are Sprinkler Heads Leaking? Common Causes

Why Are Sprinkler Heads Leaking? Common Causes

A puddle around one sprinkler head can look minor, especially after a Florida rainstorm. But if that area stays wet long after the system has shut off, it can waste water, weaken nearby turf, create muddy spots, and drive up your utility bill. Homeowners often ask, why are sprinkler heads leaking when the rest of the irrigation system seems to be working normally? The answer depends on whether the head leaks only while the zone is running or continues leaking after the system turns off.

A small amount of water draining from the lowest head in a zone may be normal. A steady trickle, a soft spot in the lawn, or water bubbling around a sprinkler is not. Finding the cause early helps protect both your lawn and your irrigation system.

Why Are Sprinkler Heads Leaking After the System Shuts Off?

When a sprinkler head continues to leak after a watering cycle, the issue is often somewhere beyond the visible sprinkler. Water may be draining downhill through the pipe, a valve may not be closing fully, or a damaged fitting below ground may be allowing water to escape.

Normal low-head drainage

If your yard slopes, the sprinkler head at the lowest point of a zone may release leftover water after the system shuts down. This is called low-head drainage. The water should stop once the pipe has emptied, usually within a few minutes.

While this is not always a repair emergency, repeated drainage can leave one area soggy and can contribute to runoff. A professional can install a check-valve sprinkler head or another appropriate solution to hold water in the line after the zone turns off.

A zone valve that is not closing completely

A leaking irrigation valve is one of the most common reasons a sprinkler keeps running or trickling when it should be off. Dirt, sand, worn parts, or a damaged diaphragm inside the valve can prevent it from sealing properly. In Northeast Florida, irrigation components work hard through long watering seasons, and debris can make its way into the system.

If multiple heads in the same zone are slowly leaking, the valve is more likely to be the problem than every individual sprinkler. This repair may involve cleaning, rebuilding, or replacing the valve, depending on its age and condition.

A cracked pipe or fitting underground

Water pooling around a sprinkler does not always mean the sprinkler itself is broken. A cracked lateral line, loose fitting, or broken connection under the head can send water upward through the soil. You may notice the lawn stays wet between scheduled watering cycles, the ground feels spongy, or water appears even when the controller is off.

Underground leaks deserve prompt attention. They can erode soil around the pipe, damage grass roots, and waste a surprising amount of water before they become obvious.

Leaks That Appear While the Sprinklers Are Running

A sprinkler head that leaks, sprays sideways, or bubbles at the base during a cycle usually has a more localized problem. These issues may affect coverage, leaving some parts of the lawn dry while soaking sidewalks, mulch beds, or the side of the house.

A damaged sprinkler body or riser

Lawn equipment, foot traffic, vehicles, and routine settling can crack a sprinkler body. A head that sits too high is more likely to get hit by a mower, while one that sits too low can fill with sand and debris. Plastic risers and threaded connections can also crack over time.

Look for water spraying from the side of the head, a head that wobbles in the ground, or a geyser-like spray from below the nozzle. These signs often point to a broken body, riser, or connection.

A worn seal or clogged nozzle

Pop-up sprinkler heads have seals that help keep water flowing through the nozzle while the head is raised. When the seal wears out or debris gets caught inside the head, water can leak around the stem instead of spraying in a clean, even pattern.

A clogged nozzle can cause similar trouble. Sand, mulch, insects, and small pieces of grass can block the opening and force water in the wrong direction. Sometimes cleaning the nozzle helps. In other cases, replacing the head is the more dependable option, particularly when the unit is old or damaged.

Incorrect water pressure

Too much pressure can make sprinkler heads mist, leak around their seals, or throw water far beyond the intended area. Too little pressure can prevent heads from popping up fully, which creates poor coverage and may look like a leak at ground level.

Pressure issues can be caused by a damaged pressure regulator, an oversized zone, a partially closed valve, pipe damage, or changes to the water supply. Because pressure affects every part of irrigation performance, it is worth having the system evaluated rather than replacing heads one at a time without addressing the source.

A missing or damaged nozzle

If a sprinkler suddenly shoots a tall stream of water instead of creating a controlled pattern, the nozzle may be missing, loose, or broken. This can happen after landscaping work, mowing, or accidental contact. The water may look dramatic, but the repair is often straightforward when the correct nozzle and spray pattern are installed.

The key is matching the replacement to the zone. A nozzle that sprays too far or applies water at a different rate can create dry patches in one section and overwater another.

What Homeowners Can Safely Check

You do not need to take apart valves or dig into irrigation lines to gather useful information. Run the affected zone for a few minutes and watch where the water starts. Then turn the system off and note whether the leak stops quickly, slows to a trickle, or continues.

It also helps to check whether the head is tilted, buried under mulch, blocked by grass, or visibly cracked. Clear loose grass and mulch away from the top of the sprinkler so it can rise and retract properly. Avoid forcing the stem up or twisting fittings underground, since a small issue can turn into a broken pipe connection.

For a clearer repair visit, write down the zone number, the time the leak appears, and whether nearby heads are also acting differently. Those details help narrow down whether the problem is a head, a valve, a line, or a pressure issue.

When a Sprinkler Leak Needs Professional Repair

Call for irrigation repair when water keeps flowing after the controller is off, the ground is consistently muddy, water is pooling near the foundation, or a zone has noticeably weaker pressure than before. You should also schedule service if the same sprinkler head keeps failing. Replacing it repeatedly without checking the riser, pipe connection, or pressure may only treat the symptom.

A qualified irrigation technician can inspect the complete zone, locate damaged components, make the repair, and adjust the heads for proper coverage. That final adjustment matters in St. Augustine lawns, where heat, sandy soil, rain patterns, and grass type all affect how much water your yard actually needs.

At American Blade Lawn Care, we approach irrigation repairs with the full landscape in mind. The goal is not simply to stop a leak. It is to restore efficient watering so your grass, beds, and outdoor space receive the right coverage without wasted water or ongoing damage.

Preventing Future Sprinkler Head Leaks

Regular inspections are the best defense against small irrigation problems becoming expensive repairs. Check your system at least once during the warmer growing season and again after landscaping projects, heavy storms, or work near sprinkler zones. Watch each zone long enough to see every head pop up, rotate or spray correctly, and shut down as expected.

Keep sprinkler heads at the proper grade, clear mulch away from their tops, and make sure mowing crews know where heads sit near lawn edges. If you are updating beds, adding hardscape, or changing the shape of your landscape, have the irrigation adjusted at the same time. A system designed for yesterday’s yard may not water today’s yard efficiently.

A leaking sprinkler head is often a manageable repair, but the water pattern tells a story. Addressing that story early keeps your lawn cleaner, healthier, and ready to look its best through the Florida growing season.

Paver Walkway Installation for Florida Homes

Paver Walkway Installation for Florida Homes

A muddy shortcut through the grass, uneven stepping stones, or a cracked concrete path can make an otherwise well-kept yard feel unfinished. Professional paver walkway installation gives your home a clean, dependable route from the driveway to the front door, around the pool, or through the backyard. More than a curb appeal upgrade, the right walkway helps protect turf, directs foot traffic, and makes the property easier to enjoy after Northeast Florida rain.

For homeowners in St. Augustine, Jacksonville, and nearby communities, the details beneath the pavers matter as much as the color on top. Our sandy soils, heavy downpours, humidity, and fast-growing landscapes can expose shortcuts quickly. A walkway should look like it belongs with your home while staying level, draining properly, and holding up to everyday use.

What a Well-Built Paver Walkway Changes

A paver walkway creates a clear path where people already walk. That may be from the driveway to the entry, from a gate to the backyard, or between a patio and a fire pit or garden area. Instead of worn grass and tracked-in sand, you get a defined surface that keeps shoes cleaner and landscaping more organized.

Pavers also give homeowners more design flexibility than a plain concrete strip. They are available in a range of shapes, tones, and laying patterns, so the path can match an existing patio, pool deck, driveway, or home exterior. A straight walkway often fits a formal front yard, while a gently curved route can soften a landscape bed and create a more natural flow.

The practical benefits are just as valuable. Individual pavers can be repaired if one becomes damaged or settles, rather than replacing an entire slab. Properly installed joints also allow the surface to move slightly with changing ground conditions without the large cracks common in aging concrete.

Paver Walkway Installation Starts Below the Surface

The visible paver is only one part of the project. Long-lasting results depend on excavation, grading, base preparation, edge restraint, and joint stabilization. Skipping any of those steps may save time initially, but it can lead to shifting pavers, low spots, standing water, and loose edges.

First, the walkway area is measured and laid out with the home’s entry points, landscape beds, irrigation lines, and drainage patterns in mind. The route needs enough width for comfortable use. A narrow side-yard path may work well at around three feet wide, while a front entry walkway often feels more welcoming at four feet or wider. The best size depends on how the area is used and how much room the property provides.

Next comes excavation. The depth must account for the paver thickness, bedding sand, compacted base material, and the finished elevation needed to keep water moving away from the home. In Florida, drainage cannot be treated as an afterthought. A walkway that sits too high can direct runoff toward a structure. One that sits too low can collect water, wash out joint sand, and become a maintenance issue.

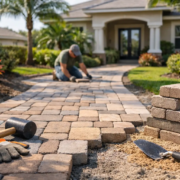
A compacted aggregate base is then installed in layers. This creates the stable foundation that carries foot traffic and helps the surface resist settling. After the base is graded and compacted, a thin, even layer of bedding sand provides the setting surface for the pavers. Each paver is placed according to the selected pattern, checked for alignment, and secured with durable edge restraints.

Once the pavers are installed, joint sand is swept between them and compacted into place. Polymeric joint sand is often a smart choice for walkways because it helps reduce erosion and weed growth when properly installed. It is not a substitute for a sound base, but it is an important finishing step that helps keep the surface locked together.

Choosing Pavers That Fit Your Yard

The best paver style is not always the most elaborate one. A walkway should complement the scale of your home and the rest of the outdoor space. For example, oversized pavers can look sharp beside a modern home with broad, simple lines, while smaller traditional pavers may better suit an established St. Augustine property with detailed architecture and mature planting beds.

Color deserves practical consideration, too. Light shades can make a shaded pathway feel brighter but may show leaf stains and dirt more easily. Very dark pavers can absorb heat in full sun. Blended earth tones are popular because they work with Florida landscaping, hide everyday dust, and pair well with mulch, stone, palms, ornamental grasses, and flowering plants.

Texture matters for safety. A heavily polished or slick surface is rarely the right choice for an exterior path that sees rain, sprinkler overspray, or pool traffic. Textured concrete pavers generally provide dependable traction while still offering a finished appearance.

A border can add definition without making the design feel busy. It may use a contrasting color, a different paver orientation, or a simple soldier course around the edges. Whether a border makes sense depends on the size of the walkway and the surrounding hardscape. On a compact path, too many colors and patterns can feel crowded. On a larger entry walk, a clean border can create a more intentional, high-end finish.

Drainage and Irrigation Need a Plan

Walkways are often installed near rooflines, landscape beds, downspouts, and irrigation zones. Those conditions should be evaluated before excavation begins. Water should flow away from the house and avoid pooling along the edges of the path. In some yards, adjusting a slope, extending a downspout outlet, or improving drainage nearby may be necessary to protect the new installation.

Irrigation is another common concern. Sprinkler heads that spray directly onto a walkway waste water and can leave mineral deposits or encourage slick algae growth in shaded spots. A landscaping professional can evaluate nearby irrigation and adjust heads so they water the lawn and plants rather than the hardscape.

This is one reason an all-in-one property service provider can make the project easier. The walkway should work with the turf, mulch beds, irrigation, edging, and drainage system already on the property. It should not create a new problem for the rest of the yard.

When to Schedule a New Walkway

Paver installation can be completed through much of the year in Northeast Florida, but scheduling depends on weather, access, and the scope of the project. A period of frequent heavy rain may affect excavation and compaction timing. If you are planning a broader landscape refresh, it is often efficient to complete the walkway before new sod, mulch, or plantings are installed.

A walkway project is also a good opportunity to address surrounding issues that have been bothering you. Maybe the front bed needs fresh edging, the side yard has bare turf from foot traffic, or the route to the pool needs better drainage. Coordinating the work can produce a cleaner finished result than tackling each issue separately over several months.

Maintaining Your Paver Walkway

Pavers are low maintenance, not no maintenance. Regular sweeping removes leaves, sand, and organic debris that can stain the surface or support algae growth. Occasional rinsing helps keep the walkway fresh, especially beneath trees or near irrigated beds.

For stubborn dirt and mildew, professional power washing can restore the surface without relying on overly aggressive pressure that may disturb joint sand. If the joints begin to thin over time, replenishing polymeric sand helps maintain stability and limits weeds. Sealing may be appropriate for some paver types and locations, particularly where staining is a concern, but it should be selected carefully. The wrong product or application can create an unnatural shine or reduce traction.

Pay attention to changes early. A small low spot, loose edge, or recurring puddle is easier to correct before it affects a larger section of the walkway. With a properly prepared base and simple periodic care, a paver path can remain an attractive part of the landscape for years.

Get a Walkway That Looks Right and Works Hard

A new walkway should do more than fill space between two points. It should make arriving home, taking out the trash, greeting guests, and moving through the yard easier in every season. American Blade Lawn Care can help homeowners create a paver path that fits the property, supports proper drainage, and complements the lawn and landscaping around it.

If your current route is worn, uneven, or simply does not match the rest of your outdoor space, start with a clear plan for where people walk and where water goes. That simple assessment is often the first step toward a cleaner, safer, better-looking yard.

Low Maintenance Florida Landscaping That Lasts

Low Maintenance Florida Landscaping That Lasts

A beautiful St. Augustine yard should not require you to spend every Saturday pulling weeds, replacing scorched plants, or dragging hoses across the lawn. The best low maintenance Florida landscaping works with our heat, humidity, sandy soil, heavy rain, and long growing season instead of fighting against them. When the right plants, mulch, irrigation, and lawn care plan come together, your property can stay clean, healthy, and inviting with far less ongoing effort.

The goal is not a yard that never needs attention. Every Florida landscape needs seasonal care. The goal is to eliminate the expensive, time-consuming problems that come from poor plant choices, thin mulch, drainage issues, and irrigation systems that are not matched to the property.

Start With a Landscape That Fits Northeast Florida

A low-maintenance yard begins with a realistic plan for the conditions around your home. St. Augustine and Jacksonville properties can vary widely. One yard may have deep shade from mature oaks, while another gets full afternoon sun and salt-laden coastal air. Some areas hold water after summer storms, while others dry out quickly because of sandy soil.

That is why copying a landscape design from another neighborhood, or another state, often leads to frustration. Plants that look great at installation can struggle within a season if they are planted in the wrong amount of sun or soil moisture. A practical design considers how the property actually performs through Florida’s wet summers, dry spells, and occasional cold snaps.

Before adding plants, look at the basics: where water drains, where irrigation reaches, how much sun each bed receives, and how much room plants will need at maturity. Giving shrubs enough space from the beginning prevents constant pruning later. It also improves airflow, which can reduce disease pressure in humid weather.

Choose Plants That Do Not Need Constant Rescue

The easiest landscape beds use plants adapted to Florida conditions and grouped by similar watering needs. Native and Florida-friendly plants are often a smart choice because they can handle local weather once established. They still need proper installation and watering during their first growing season, but they are less likely to demand constant replacement afterward.

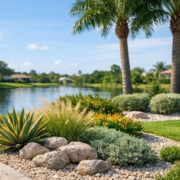
For sunny areas, options such as firebush, muhly grass, coontie, lantana, pentas, and some varieties of dwarf yaupon holly can provide color and structure without the workload of high-maintenance annual beds. In shadier spaces, cast iron plant, ferns, liriope, and certain palms may be a better fit. The right choice depends on the specific site, not just what is popular at the garden center.

Use flowering annuals sparingly if low upkeep is the priority. They can add a strong pop of color near an entryway, mailbox, or patio, but they usually need more frequent watering, feeding, deadheading, and replacement. A better long-term approach is to create the foundation with dependable shrubs, ornamental grasses, and groundcovers, then add seasonal color only where it will have the most visual impact.

Avoid planting fast-growing shrubs in small spaces. They may look neat on installation day, but a hedge that outgrows its bed will need repeated trimming to keep doors, windows, walks, and driveways clear. Choosing a plant with a mature size that fits the location saves time and keeps the landscape looking more natural.

Mulch Does More Than Make Beds Look Finished

Fresh mulch is one of the simplest ways to make a property look cared for, but its value goes well beyond curb appeal. A properly mulched bed helps hold moisture in the soil, moderates soil temperature, reduces weed growth, and protects plant roots from mower and trimmer damage.

For most landscape beds, a layer around two to three inches deep is enough to do the job. Too little mulch leaves bare soil exposed. Too much can trap excess moisture around roots and create problems for shrubs and trees. Mulch should also be kept away from the base of trunks and plant stems rather than piled against them.

Pine bark, pine straw, and hardwood mulch can all work well in Northeast Florida when installed correctly. The best option depends on the style of your property, the slope of the bed, and how often you want to refresh it. Pine straw has a natural look and works well around many trees, while mulch can create a crisp, finished appearance around foundation beds and walkways.

A clean edge between lawn and mulch beds is just as important. Defined edges keep turf from creeping into planting areas and make weekly mowing and trimming faster. This is a small detail that gives the whole property a sharper, more intentional appearance.

Build Irrigation Around Plant Needs, Not a Set Schedule

Irrigation is where many Florida landscapes either thrive or become expensive to maintain. Watering too little stresses grass and shrubs. Watering too much can encourage fungus, shallow roots, weeds, and unnecessary water bills. A low-maintenance system should deliver water efficiently and be adjusted as the weather changes.

Turf areas generally need a different watering approach than landscape beds. Spray heads may work well for lawn coverage, while drip irrigation can be a better choice for shrubs and plants because it delivers water closer to the root zone. Drip systems can reduce waste from overspray onto driveways, patios, and exterior walls.

Rain sensors, working controllers, and regular inspections matter more than many homeowners realize. A broken head can leave one section of lawn dry while flooding another. A controller set for the rainy season may waste water if it continues running after frequent summer storms. Even a well-designed landscape will struggle if the irrigation system is not maintained.

If you notice dry patches, standing water, unusually high water use, or plants declining in one area of the yard, it is worth having the system checked before replacing plants. Often, the real problem is coverage, pressure, drainage, or a hidden irrigation repair need.

Keep the Lawn Simple and Healthy

A low-maintenance landscape does not mean ignoring the lawn. In fact, a healthy lawn reduces the work around it by limiting bare spots where weeds can take over. St. Augustine grass is common in this area, but it needs a maintenance plan that respects its growing habits, sun exposure, and soil conditions.

Mowing at the proper height, using sharp blades, and avoiding overly aggressive cutting are essential. Cutting grass too short can weaken it during summer heat and make it more vulnerable to weeds and disease. Routine edging also keeps grass out of beds and off hard surfaces, making the yard look maintained even between larger projects.

Fertilization, weed control, and aeration should be based on the lawn’s condition rather than treated as one-size-fits-all services. A shaded lawn may need a different strategy than a sunny lawn. Areas with compacted soil or poor root growth may benefit from aeration, while thin turf may point to irrigation, pest, drainage, or shade concerns. The right answer depends on what is happening below the surface, not just what the grass looks like from the street.

Use Hardscapes to Reduce High-Care Areas

Not every part of the property needs to be grass or planting bed. A well-placed paver path, gravel section, stone border, patio expansion, or defined seating area can reduce mowing and create a more useful outdoor space. Hardscape improvements are especially helpful in areas where turf repeatedly struggles because of heavy shade, foot traffic, or poor drainage.

The trade-off is that hardscapes still need thoughtful installation. Poor grading can direct water toward the house, and the wrong materials can shift or stain over time. When planned correctly, though, these features reduce maintenance while improving how you use the yard.

A small gravel area around a fire pit, a paver walkway from the driveway, or a clean border around a mailbox can make a home feel more finished without adding another bed full of plants to water and trim. The best projects solve a problem and add curb appeal at the same time.

Low Maintenance Florida Landscaping Needs Seasonal Attention

Florida landscapes grow nearly year-round, so “low maintenance” should never be confused with “no maintenance.” Mulch needs refreshing, hedges need occasional shaping, weeds need control, and irrigation needs adjustment. The difference is that a well-planned property requires predictable, manageable care instead of repeated rescue work.

A practical schedule usually includes routine mowing and edging during active growth, periodic hedge trimming, weed control, mulch refreshes, and irrigation checks before minor issues become major repairs. Power washing can also keep driveways, walkways, and patios from looking stained after humid weather and heavy rain.

American Blade Lawn Care helps homeowners build customized plans around their grass type, soil conditions, irrigation needs, and landscape goals. Whether your property needs a few smart upgrades or a complete redesign, the right local care can save you time while protecting the investment you have made in your home.

A yard should be a place you enjoy seeing when you pull into the driveway, not another weekend project waiting for you. Start with the areas causing the most work, make improvements that fit your property, and choose a maintenance plan that keeps the results looking good season after season.

Front Yard Landscape Design for Florida Homes

Front Yard Landscape Design for Florida Homes

A great front yard landscape design should still look good after an August downpour, a week of strong sun, and the regular comings and goings of family life. In St. Augustine, Jacksonville, and across Northeast Florida, that means designing for more than a pretty first impression. Your front yard needs plants that can handle the climate, irrigation that delivers water where it belongs, and defined spaces that stay clean and manageable.

The right plan can make a modest home look more polished, frame its best features, and reduce the constant battle with weeds, bare spots, and overgrown shrubs. The key is making practical choices before mulch, plants, or hardscape materials ever go in.

Start With How Your Yard Actually Performs

Every property has its own conditions. One front yard may get intense afternoon sun and hold water near the driveway. Another may sit under mature oaks, have sandy soil, and struggle to keep grass healthy near the entryway. Copying a landscape from a photo without accounting for those conditions often leads to expensive replacements and extra maintenance.

A useful design starts with the basics: sun exposure, drainage, soil, grass type, existing irrigation coverage, and how people move through the space. Notice where water pools after rain, where turf thins out, and whether shrubs block windows, walkways, or house numbers. These details tell you what the yard needs to work better, not just what it needs to look different.

For many Florida homeowners, drainage deserves attention early. A fresh planting bed will not solve water that repeatedly washes mulch into the sidewalk or leaves roots sitting wet for days. Depending on the property, the solution may involve reshaping a bed, improving downspout runoff, adjusting grading, or choosing plants that fit a wetter area. Good landscape work considers the whole property, not only the plants visible from the street.

Build a Front Yard Landscape Design Around Focal Points

Your home already gives the landscape a starting point. The front door, porch, walkway, driveway, and architectural details should guide the layout. A well-designed yard draws the eye toward the entrance and creates a clean transition from the street to the home.

Foundation beds are often the most visible part of the plan. They should soften the base of the house without becoming a row of oversized shrubs that hide windows and make the property feel crowded. Layering works well: lower plants near the front edge, medium-height material behind them, and taller accents placed where they will not cover important features.

The walkway is another opportunity to create order. Defined bed lines, healthy turf edges, and balanced plantings can make even a simple concrete path feel intentional. If a walkway is narrow, uneven, or difficult to navigate, a hardscape improvement may offer a better long-term result than trying to disguise the issue with plants.

Symmetry can look sharp around a formal entry, but it is not the only option. An asymmetrical arrangement may better suit a wide lot, a curved drive, or a home with an offset porch. What matters is visual balance. A large palm or specimen tree on one side may need a substantial planting bed, boulder feature, or grouping of shrubs on the other to keep the yard from feeling lopsided.

Choose Plants for Florida Conditions, Not Just First-Day Color

Color is valuable, but plant performance matters more. Northeast Florida landscapes deal with heat, humidity, sandy soils, heavy rain, occasional cold snaps, and active insect pressure. Plants selected for the wrong conditions can look great at installation, then decline when the weather turns demanding.

A dependable design usually combines evergreen structure with seasonal color and texture. Evergreen shrubs give the beds a finished appearance through the year. Flowering plants and annual color can add brightness near the entry or mailbox, but they typically require more frequent attention. Ornamental grasses, palms, and carefully placed small trees can add height and movement without filling every bed with high-maintenance material.

Native and Florida-friendly selections are often smart choices because they can be better suited to local conditions once established. That does not mean every yard needs to follow one plant palette. Some homeowners prefer a tropical look, while others want a clean, traditional design. The best choice depends on sunlight, irrigation, desired upkeep, and the overall style of the home.

There is always a trade-off. Fast-growing plants fill empty areas quickly, but they may require frequent trimming to stay out of windows and walkways. Bright flowering plants can make a strong statement, but they may need more water, feeding, or replacement than durable green shrubs. A good plan sets clear expectations so the landscape stays attractive without becoming a weekly chore.

Make Irrigation Part of the Design

Plants and turf cannot perform if irrigation is uneven, wasteful, or broken. A common issue in established front yards is a system designed around lawn coverage that does not properly serve new landscape beds. Sprinkler heads may spray sidewalks, miss dry areas, or water shrubs too aggressively.

Before installing new plantings, inspect the irrigation system and identify zones that need adjustment or repair. Turf, foundation beds, and containers often have different watering needs. A targeted system helps protect your investment while reducing unnecessary runoff.

Overwatering is just as damaging as underwatering in many Florida yards. Constantly wet soil can weaken roots, encourage disease, and create conditions where weeds thrive. Seasonal changes matter too. A schedule that works during dry spring weather may be excessive during the summer rainy season. Proper irrigation management keeps the landscape healthier and makes maintenance more efficient.

Use Mulch and Edging to Keep Beds Looking Finished

Fresh mulch can dramatically improve curb appeal, but it does more than provide color. It helps hold moisture in the soil, moderates root temperatures, and gives beds a clean, consistent appearance. In Florida, mulch also needs to stay where it belongs when heavy rain arrives.

Bed edges should be crisp enough to separate lawn from mulch and make mowing easier. A clean edge reduces the chance that grass creeps into planting beds and helps the entire yard look cared for between service visits. The right edging approach depends on the property. A simple cut edge may work well for a natural look, while a more defined border can help contain mulch and create stronger lines near hardscape areas.

Avoid piling mulch against plant stems or the base of trees. Mulch should be spread evenly, not built into thick mounds. Too much material around trunks and stems can trap moisture and cause plant health problems over time.

Plan for Maintenance From Day One

The most successful front yard landscapes are designed with future care in mind. Leave enough room for shrubs to mature, select plants that can be maintained at a reasonable height, and avoid squeezing too many varieties into a small bed. A crowded design can look full on installation day but quickly become difficult to trim, weed, and refresh.

Routine lawn mowing, edging, hedge trimming, weed control, and mulch refreshes all play a role in protecting the finished look. Landscape design and lawn care work best when they support each other. Healthy turf makes beds stand out, while clean beds make the lawn look greener and more defined.

For busy homeowners, a professional plan also creates accountability. Instead of calling separate providers for irrigation trouble, overgrown hedges, patchy grass, and worn-out beds, it is easier to work with a local team that understands how each part of the yard affects the next. American Blade Lawn Care helps homeowners build and maintain outdoor spaces that fit local conditions and daily life.

Know When a Refresh Is Enough and When a Redesign Makes Sense

Not every front yard needs to be completely rebuilt. If the bed layout is sound and the plants are healthy, a mulch installation, selective trimming, weed control, and a few new accents may be all it takes to restore curb appeal. This is often a smart option for homeowners preparing for a gathering, sale, or new season.

A fuller redesign makes more sense when drainage problems persist, irrigation is poorly matched to the landscape, plants have outgrown their space, or the yard no longer fits the home. It can also be worthwhile after exterior renovations, driveway changes, or the loss of a mature tree that has changed sun exposure.

A front yard should welcome you home just as well as it welcomes guests. Start with the conditions on your property, choose materials that can handle Florida weather, and build a design you will be glad to maintain year after year.

Driveway Pressure Washing Service That Lasts

Driveway Pressure Washing Service That Lasts

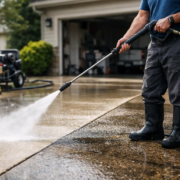
A clean driveway changes the way your entire property looks before anyone reaches the front door. In Northeast Florida, a professional driveway pressure washing service removes the dark streaks, algae, mildew, tire marks, and embedded dirt that make concrete look older than it is. More than a quick cosmetic fix, the right cleaning approach helps homeowners protect a hard-working surface from the effects of heat, humidity, rain, and daily traffic.

At American Blade Lawn Care, we see driveways as part of the complete outdoor picture. A freshly maintained lawn, trimmed landscape beds, and a stained driveway do not send the same message as a property that is clean from the curb to the entryway. Professional power washing gives homeowners in St. Augustine, Jacksonville, and nearby communities a fast, noticeable improvement without adding another weekend project to the list.

Why Florida Driveways Get Dirty So Quickly

Concrete is strong, but it is not a solid, sealed slab. It contains tiny pores that hold moisture, dust, pollen, oil residue, and organic growth. Florida’s warm, wet conditions give algae and mildew plenty of opportunity to settle into those pores, especially on shaded sections of a driveway or areas that stay damp after a storm.

The black, green, and gray staining homeowners notice is often more than surface dust. Mildew and algae can create a slick walking surface when wet. Oak leaves, pine needles, mulch, fertilizer residue, and vehicle fluids can also leave stains that become more difficult to remove the longer they sit.

Homes near the coast face another challenge: windblown salt and fine sand. These particles collect in driveway joints and along edges, where they can hold moisture and make the concrete look dull. Regular cleaning keeps that buildup from becoming the first thing visitors see.

What a Professional Driveway Pressure Washing Service Does Differently

Pressure washing may look simple from a distance, but good results depend on matching the process to the surface and the condition of the driveway. Too little pressure leaves stains behind. Too much pressure, or a nozzle held too close, can leave visible lines, roughen the concrete, damage expansion joints, and expose the aggregate beneath the surface.

A professional service begins by assessing the concrete. The cleaning method should account for the driveway’s age, existing cracks, stain type, drainage, shade, and nearby landscaping. Oil spots need a different treatment than algae growth, and older concrete may require a more controlled approach than a newer slab.

The work typically includes clearing loose debris, applying an appropriate cleaning treatment when needed, and using controlled pressure to lift grime evenly across the surface. Attention to the edges, joints, apron, and transition to the walkway matters. Those details are where dirt often remains after an uneven DIY cleaning job.

The goal is not to blast the driveway as hard as possible. It is to remove buildup safely and leave an even, refreshed appearance that fits the rest of the property.

Cleaner Concrete, Better Curb Appeal

A stained driveway can make a well-kept home appear neglected, even when the roof, lawn, and landscaping are in great shape. Cleaning the concrete brightens the property’s largest hard surface and creates a sharper contrast with green grass, fresh mulch, and trimmed shrubs.

That improvement matters whether you are preparing for guests, putting a home on the market, managing a rental property, or simply taking pride in where you live. For many homeowners, driveway cleaning is one of the most immediate exterior upgrades available because the difference is visible the same day.

A Safer Surface Around the Home

Algae and mildew are not only unattractive. In a humid climate, they can make driveways and walkways slippery after rain or morning dew. This is especially common in shaded areas near trees, irrigation spray, gutters, or landscape beds.

Pressure washing removes the surface growth that contributes to slippery conditions. It cannot correct poor drainage or a leaking irrigation head, but it can be an important part of keeping high-traffic exterior surfaces cleaner and safer. If recurring growth is concentrated in one area, that is also a good reason to inspect drainage and irrigation patterns.

When Should You Schedule Driveway Cleaning?

Most Northeast Florida homeowners benefit from professional driveway washing about once a year. Properties with heavy shade, dense tree cover, frequent irrigation overspray, or nearby construction dust may need service more often. The right schedule depends on what is happening at your home, not a one-size-fits-all calendar.

There are a few signs that it is time to schedule service: the concrete looks gray or patchy compared with its original color, dark streaks appear near the garage or along the edges, green growth returns after rain, or the driveway feels slick underfoot. It also makes sense to clean before hosting a major gathering, listing a property, or completing other landscape improvements.

Timing can be useful when coordinating exterior projects. For example, pressure washing before fresh mulch installation helps keep the driveway and front approach clean. If your home is receiving irrigation repair or landscaping work, cleaning afterward may be the better choice if equipment or soil will cross the concrete. A local provider can help plan the order of work so one project does not undo another.

Pressure Washing Is Not the Same as Fixing Concrete Damage

Power washing can make concrete look dramatically better, but it has limits. It will not repair settling slabs, large cracks, crumbling edges, or deep rust stains caused by metal and irrigation water. It also will not eliminate an active oil leak from a vehicle.

Cleaning is still worthwhile because it reveals the true condition of the surface. Once dirt and growth are gone, homeowners can better see hairline cracks, drainage issues, and areas that may need repair. If the driveway has been sealed, the service method should be adjusted to avoid stripping or damaging that protective coating.

Be careful with anyone who promises to make every mark disappear. Some stains are permanent, particularly if they have penetrated deeply over years. A dependable contractor sets realistic expectations, explains the likely result, and focuses on getting the cleanest safe finish possible.

How to Keep Your Driveway Clean Longer

Professional cleaning delivers the reset, while a few simple habits can extend the results. Sweep leaves and pine needles before they break down and hold moisture against the concrete. Address vehicle leaks promptly, and rinse away fertilizer or lawn treatment spills when they occur.

Keep sprinkler heads aimed at the lawn rather than the driveway. Overspray is a common reason algae returns quickly along one side of the concrete. If gutters dump water onto the driveway, improving drainage can reduce staining and help prevent washouts near the slab.

Avoid using aggressive acids, bleach mixtures, or high-pressure rental equipment without understanding how they affect concrete, grass, and landscape plants. The lowest-cost approach can become expensive if it etches the surface, kills turf along the edges, or leaves permanent striping. Professional equipment and experienced technique are especially valuable when the driveway connects to delicate landscaping or decorative hardscape features.

Choose a Local Team That Sees the Whole Property

The best driveway pressure washing service does more than make concrete look lighter for a day. It considers nearby plants, turf, drainage, walkways, and the overall condition of your exterior. That is particularly useful for homeowners who prefer one reliable local team for lawn care, landscaping, irrigation, and exterior cleaning.

Ask whether the company evaluates the surface before starting, uses methods suited to concrete, protects surrounding areas, and provides a clear estimate. Dependable communication matters just as much as the equipment. You should know what will be cleaned, what results are realistic, and when the work will be completed.

Your driveway carries cars, foot traffic, rain, pollen, and everything Florida weather brings. Give it the same level of care as the lawn and landscape around it. A professional cleaning can restore the clean, welcoming approach your home deserves – and make every trip up the drive feel a little better.

Power Washing House Cost in St. Augustine

Power Washing House Cost in St. Augustine

Salt air, humidity, afternoon storms, and shaded corners can leave a Northeast Florida home looking older than it is. If you are researching power washing house cost, the right question is not only what you will pay, but what the service will safely remove and how long the results should last.

For homeowners in St. Augustine, Jacksonville, and nearby communities, professional exterior cleaning is one of the fastest ways to restore curb appeal. A properly cleaned home can look brighter, better maintained, and more welcoming without the cost of repainting or major exterior repairs.

What Does Power Washing a House Usually Cost?

Most professional house washing jobs are priced by the size of the home, the exterior material, the level of buildup, and how easy the surfaces are to access. A small, single-story home with light mildew may cost a few hundred dollars, while a larger two-story home with heavy staining, multiple exterior surfaces, and difficult access will cost more.

As a general planning range, homeowners often see house washing estimates from about $250 to $800 or more. Larger properties, heavily soiled siding, roofs, driveways, pool decks, patios, and screened enclosures can raise the total. The best way to get an accurate number is a free on-site estimate that accounts for the actual condition of your property.

A low price can be appealing, but it should come with clear answers. Ask what surfaces are included, whether cleaning solutions are part of the estimate, how plants are protected, and whether the company uses an appropriate low-pressure method for siding and painted areas. A rushed job that misses stains or damages exterior finishes is not a bargain.

What Affects Power Washing House Cost?

No two homes collect dirt and organic growth in exactly the same way. In Florida, the moisture that helps landscapes thrive can also create the perfect conditions for algae, mildew, and dark streaks on exterior surfaces.

Home size and number of stories

More square footage generally means more labor, water, cleaning solution, and time. A one-story ranch home is usually quicker to clean than a two-story home with upper-level siding, dormers, balconies, or hard-to-reach areas.

The footprint is not the only factor. A home with many angles, columns, porches, shutters, or detailed trim may require more careful work than a simple exterior of the same size.

Exterior material and cleaning method

Vinyl, painted wood, stucco, brick, Hardie board, and concrete do not all respond the same way to pressure. Some surfaces can handle stronger pressure, while others require soft washing or low-pressure cleaning combined with the right detergent.

This matters because true professional service is not about blasting every surface at maximum force. High pressure on the wrong material can strip paint, force water behind siding, damage stucco, scar wood, or harm window seals. The equipment and technique should match your home, not the other way around.

Amount of algae, mildew, and staining

Light dust and pollen are one thing. Thick green algae on shaded walls, black mildew around gutters, rust stains, spider webs, and years of grime take more preparation and treatment. Homes near trees, marsh areas, the coast, or heavily shaded lots often need more frequent cleaning than homes with full sun and open airflow.

Heavy buildup may increase the estimate, but it also makes professional cleaning more worthwhile. Removing organic growth improves the appearance of siding, trim, walkways, and entry areas in a way that ordinary garden-hose rinsing cannot.

Access and property layout

Tight side yards, steep ground, delicate landscaping, fenced areas, and limited access can affect labor time. A careful crew needs room to work safely around plants, outdoor furniture, irrigation components, lighting, and other features.

A clear driveway and accessible exterior can help the job move efficiently. You should not have to prepare your entire property yourself, but moving fragile décor, toys, and personal items before service is always a good idea.

Additional surfaces included in the service

Many homeowners schedule house washing along with other exterior cleaning needs. Combining services can be more convenient than arranging separate visits, especially when the home, driveway, walkways, patio, pool deck, fence, or screened enclosure all need attention.

Common add-on services include:

  • Driveway and sidewalk cleaning
  • Patio, paver, and pool deck cleaning
  • Screen enclosure cleaning
  • Fence and gate washing
  • Exterior gutter brightening
  • Pressure washing for entryways and curb areas

Bundling can improve the overall look of your property in one visit. It may also be more cost-effective than cleaning each surface separately, depending on the scope of work.

House Washing vs. Pressure Washing: Why the Difference Matters

Homeowners often use “power washing,” “pressure washing,” and “house washing” interchangeably. In everyday conversation, that is understandable. During the job, though, the cleaning approach matters a great deal.

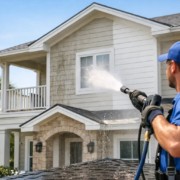
Concrete driveways and durable hardscapes may need pressure washing to lift embedded dirt, tire marks, algae, and surface grime. House siding, painted surfaces, soffits, and trim often need a gentler soft-wash process. This method uses appropriate cleaning solutions and controlled low pressure to remove organic growth without treating your home like a driveway.

The goal is a clean exterior without unnecessary risk. A professional should inspect the material, test the right approach, and protect surrounding landscaping while working. That attention to detail is part of what you are paying for.

Is Professional House Washing Worth the Cost?

For many homeowners, yes. Exterior cleaning can make an immediate difference before hosting guests, listing a home for sale, completing a landscaping project, or simply getting back the pride of pulling into a clean property.

It can also help you stay ahead of the stains that develop quickly in Florida’s humid climate. Regular cleaning does not replace painting, repairs, or routine maintenance, but it can help you spot problem areas sooner. Once dirt and algae are removed, peeling paint, damaged caulk, cracked siding, and drainage issues are easier to see.

DIY washing can look less expensive at first. However, renting equipment, buying detergents, spending a weekend on the job, and learning how to avoid damage can add up. There is also the safety concern of using pressure equipment around ladders, upper stories, windows, electrical fixtures, and slippery surfaces.

Professional service makes the most sense when the home has significant buildup, delicate finishes, second-story areas, or several surfaces that need cleaning at once. For a small, lightly soiled concrete patio, DIY may be reasonable if you have the right equipment and understand safe operation. For the full exterior of your home, experience and the correct method make a real difference.

How Often Should You Wash Your House in St. Augustine?

Most Northeast Florida homes benefit from professional exterior washing about once a year. Some properties need service every six to nine months, especially if they are surrounded by mature trees, have shaded exterior walls, sit near water, or develop algae quickly.

Do not wait until the entire home looks green or gray. Early cleaning is usually easier than dealing with deep, established buildup. Watch for streaks below gutters, green growth on north-facing walls, darkened soffits, slippery walkways, and dingy areas around entry doors and outdoor living spaces.

Get a Clear Estimate Before the Work Begins

A dependable estimate should be straightforward. It should explain which areas will be cleaned, identify any add-on surfaces, and give you a clear price before work starts. If a company cannot explain its process or gives a vague quote without looking at the property, keep looking.

At American Blade Lawn Care, we take pride in helping local homeowners keep the whole exterior of their property looking cared for, from the lawn and landscape beds to the hard surfaces that frame your home. Our team can assess your cleaning needs, recommend the right service for your surfaces, and provide a free estimate with no guesswork.

A clean home exterior changes the way your property feels the moment you pull into the driveway. Schedule service before stains become the first thing visitors notice, and give your home the fresh, well-kept appearance it deserves.

When to Aerate a Florida Lawn for Better Growth

When to Aerate a Florida Lawn for Better Growth

A St. Augustine lawn can look green on the surface while struggling underneath. If water puddles after rain, grass thins along walkways, or the ground feels hard underfoot, compacted soil may be keeping roots from getting the air, water, and nutrients they need. Knowing when to aerate florida lawn areas is the difference between helping your turf recover and putting extra stress on it.

For most Northeast Florida homeowners, lawn aeration works best when warm-season grass is actively growing and can quickly fill in the openings left by the aerator. That usually means late spring through early summer, but the best timing still depends on your grass type, soil, irrigation, and the condition of the lawn.

When to Aerate a Florida Lawn

In St. Augustine and Jacksonville-area yards, the best window for core aeration is generally April through June. By then, daytime temperatures are consistently warm, the grass is growing steadily, and roots have the energy to recover. Aerating during this period gives St. Augustine grass, Bermuda grass, zoysia, and other warm-season varieties time to thicken up before the slower growth of fall and winter.

Late spring is often ideal because the lawn is coming out of its winter slowdown but has not yet faced the full pressure of Florida’s hottest, wettest weather. Early summer can also be a good choice, especially for lawns that receive reliable irrigation and are not already stressed by drought, insects, or disease.

A calendar can point you in the right direction, but it should not make the decision by itself. A lawn should be actively growing, reasonably healthy, and able to receive proper watering after service. If your grass has not started greening up fully, wait. If it is already showing serious stress from heat, dry conditions, or disease, address that problem first.

Why winter aeration usually misses the mark

Florida winters are milder than those in many parts of the country, but warm-season turf still slows down considerably. Aerating a dormant or semi-dormant lawn in late fall or winter leaves open holes that may not recover quickly. That can make the yard look rough longer and create an opportunity for weeds to move into thin areas.

Early spring can also be too soon for many lawns in St. Augustine. The grass may look like it is waking up, but it has not yet built enough active growth to heal efficiently. Waiting until the lawn is fully green and growing is usually the better investment.

Signs Your Lawn May Need Aeration

Not every lawn needs aeration every year. Many Northeast Florida properties have sandy soil that drains well naturally, while others have soil that becomes compacted from construction, heavy foot traffic, pets, vehicles, and repeated mowing. The condition of your yard matters more than following a rigid annual schedule.

Your lawn may benefit from core aeration if water runs off or puddles instead of soaking in, even after a normal rain. You may also notice thin grass in high-traffic areas, bare spots near gates or walkways, and turf that wilts faster than expected despite regular watering.

A simple test can help. Try pushing a screwdriver or similar narrow tool into moist soil. If it is difficult to push several inches down, compaction may be limiting root growth. Another clue is excessive thatch, which is the dense layer of dead stems and organic material between the green grass and the soil. A thin thatch layer is normal, but a thick, matted layer can block water and fertilizer from reaching the root zone.

Compaction is especially common in newer neighborhoods where construction equipment has pressed down the soil. It can also develop around patios, play areas, pools, driveways, and other parts of the property that receive regular use. These are often the first areas where turf starts looking tired, patchy, or difficult to maintain.

What Aeration Does for Florida Grass

Core aeration removes small plugs of soil from the lawn rather than simply poking holes into the surface. Those openings create room for air exchange and improve the path for water and nutrients to move into the soil. They also help roots grow deeper, which can make the lawn more resilient during dry spells and summer heat.

For Florida homeowners, the benefit is not just greener grass. Better root development can improve how efficiently your lawn uses irrigation and fertilizer. That matters when heavy rain alternates with hot, dry stretches, as it often does in Northeast Florida.

Aeration can also improve the effectiveness of other lawn care services. If compacted soil is preventing water from moving down to the roots, changing your watering schedule alone may not solve the issue. Likewise, fertilizer applied to a lawn with severe compaction may not deliver the result you expect. Aeration helps create better conditions for the rest of your lawn care plan to work.

It is not a cure-all, though. Aeration will not fix a broken irrigation zone, eliminate a major weed problem, correct poor drainage caused by grading, or bring dead grass back to life. Those issues need their own solution. A professional evaluation can determine whether compaction is truly the problem or whether your lawn needs irrigation repair, weed control, soil improvement, or a combination of services.

Timing Aeration Around Rain and Irrigation

The soil should be moist when a lawn is aerated, not bone dry and not saturated. Slightly moist soil allows the aerator to pull clean plugs at the proper depth. Soil that is too dry can resist the machine, while a soaked lawn can become muddy, compacted further by equipment, and difficult to work safely.

A light watering the day before service may help if conditions have been dry. On the other hand, it is smart to avoid scheduling immediately after a major Florida downpour. The goal is workable soil, not a muddy yard.

After aeration, keep the lawn consistently watered according to the season and your local watering restrictions. The plugs left on top of the grass will break down naturally with mowing, rain, and irrigation. They may look messy for a short time, but they are part of the process and return valuable organic material to the lawn.

If your lawn is due for fertilizer, aeration can be a useful time to coordinate the two services. Because the soil has been opened up, nutrients have a clearer route toward the root zone. The right product and timing should still match your grass type and current lawn conditions. Over-fertilizing a stressed lawn can create more trouble than it solves.

Grass Type Matters in St. Augustine and Jacksonville

St. Augustine grass is common throughout the area and responds best to aeration when it is actively spreading in warm weather. Its above-ground runners can fill in small openings over time, but it needs warmth, moisture, and healthy growth to do that well.

Bermuda grass recovers aggressively during late spring and summer, making it a strong candidate for aeration during its active season. Zoysia can also benefit from aeration, particularly in compacted areas, but it grows more slowly than Bermuda. That makes proper timing and aftercare especially valuable.

Centipede grass requires a more careful approach. It generally prefers lower fertility and can be less forgiving when stressed. If you have centipede, avoid treating aeration as an automatic annual task. Evaluate compaction, thatch, irrigation, and overall turf health first.

What to Do Before and After Lawn Aeration

Mowing the lawn shortly before aeration can help the equipment reach the soil more effectively. The grass should be free of large branches, toys, hoses, and other obstacles, and irrigation heads should be clearly marked or known before work begins. This protects your system and helps the job go smoothly.

After aeration, continue normal mowing once the lawn is ready, but avoid heavy traffic for a few days if possible. Give the roots time to take advantage of the improved soil conditions. Watch for areas that remain wet, thin, or weak after treatment. Those spots may point to a separate drainage or irrigation issue that needs attention.

A healthy Florida lawn is built from the ground up. If your turf feels hard, drains poorly, or struggles to stay full in high-use areas, a customized evaluation from American Blade Lawn Care can help determine whether aeration is the right next step and when your yard will benefit most.

Lawn Aeration Service Near Me: What to Look For

Lawn Aeration Service Near Me: What to Look For

A search for a lawn aeration service near me often starts after a homeowner notices the same frustrating pattern: grass that looks thin, water that runs off instead of soaking in, and bare spots that never seem to fill back in. In St. Augustine, Jacksonville, and surrounding Northeast Florida communities, compacted soil can quietly limit even the most consistent mowing, watering, and fertilizing routine.

Aeration is not a cosmetic shortcut. It is a practical lawn-health service that gives grass roots better access to the air, moisture, and nutrients already present in your soil. When it is performed at the right time and paired with care that fits your grass type and property conditions, the result can be a fuller, healthier lawn that is easier to maintain.

What Lawn Aeration Actually Does

Over time, soil becomes compressed by foot traffic, kids and pets playing in the yard, mowing equipment, heavy rain, and Florida’s dense or sandy soil conditions. Thatch – the layer of stems, roots, and organic material between the grass blades and soil – can also build up. A small amount of thatch is normal, but too much can prevent water and nutrients from reaching the root zone.

Core aeration addresses both concerns by removing small plugs of soil across the lawn. Those openings create direct channels for water, oxygen, and nutrients to move into the ground. They also give grass roots room to spread deeper, which helps the lawn handle heat, dry periods, and regular use more effectively.

The plugs left behind may look messy for a short time, but they are a good sign. They break down naturally, returning soil and organic matter to the lawn. Most homeowners see the lawn settle quickly, especially when it receives proper irrigation and routine maintenance afterward.

Signs You May Need a Lawn Aeration Service Near Me

A lawn does not have to be completely brown or bare to benefit from aeration. Often, the early signs are subtle. If your yard feels hard underfoot, puddles after irrigation, or sheds water downhill during a rainstorm, compacted soil may be part of the problem.

Patchy growth is another common clue. If certain areas stay thin despite watering and fertilizer, the issue may not be what you are putting on the lawn. It may be that the roots cannot access it. High-traffic areas near gates, sidewalks, patios, play areas, and driveways are especially likely to become compacted.

Watch for these conditions as well:

  • Water pooling or running off instead of soaking into the soil
  • Grass that looks stressed even when irrigation is running properly
  • Bare or thinning areas in frequently used sections of the yard
  • A spongy feel caused by excessive thatch, or a hard surface caused by compaction
  • Weak response after fertilization or seasonal lawn treatments

Aeration is not the answer to every lawn issue. Disease, insect damage, poor irrigation coverage, weed pressure, shade, and improper mowing height can create similar symptoms. That is why a local evaluation matters. The right service provider should look at the full picture before treating aeration as a one-size-fits-all fix.

Why Florida Lawns Need a Local Approach

Northeast Florida lawns face a different set of demands than lawns in cooler parts of the country. Heat, humidity, heavy summer rain, sandy soil, and periods of drought can all affect how grass develops. St. Augustine grass, Bahia grass, Bermuda grass, and Zoysia grass each have different growth habits and seasonal needs.

For example, a lawn with sandy soil may drain quickly but still have compacted zones from traffic and equipment. A property with dense, amended soil may hold moisture longer and develop thatch more easily. Irrigation can also change the equation. Too little water stresses roots, while frequent shallow watering can encourage roots to stay near the surface.

Timing matters, too. Aeration is generally most helpful when warm-season grass is actively growing and can recover quickly. The exact timing depends on your grass type, recent weather, the condition of the lawn, and any other planned treatments. Aerating a stressed lawn at the wrong time can create unnecessary pressure, so professional recommendations should be based on what is happening in your specific yard.

What a Professional Aeration Visit Should Include

A quality aeration service begins before the machine reaches the grass. The lawn should be reviewed for irrigation heads, shallow utility lines, landscape lighting, tree roots, drainage concerns, and areas that may need a different approach. Marking and protecting those features helps prevent damage while allowing the technician to work thoroughly.

The lawn is typically mowed to an appropriate height, and the soil should have enough moisture for clean core removal. Soil that is bone-dry can be difficult to aerate effectively, while saturated ground can become muddy and damaged under equipment. A knowledgeable crew will assess conditions and schedule the work accordingly.

After aeration, the next steps depend on the lawn’s needs. This can be an excellent time to improve watering practices, apply a suitable treatment, address irrigation problems, or plan follow-up care for thin areas. Aeration creates an opportunity, but it works best when the rest of the lawn-care plan supports healthy root growth.

Aeration, Dethatching, and Overseeding Are Not the Same

These services are often grouped together, but they solve different problems. Aeration relieves compaction and improves movement through the soil. Dethatching removes an overly thick organic layer that is blocking water and nutrients from reaching roots. Overseeding adds new grass seed, which is more common for cool-season lawns than for many established Florida warm-season lawns.

Your property may need one of these services, a combination of them, or neither. For a warm-season lawn in St. Augustine or Jacksonville, spreading seed without considering the existing grass, season, shade, and irrigation can waste money. A better plan starts with identifying why the lawn is thin in the first place.

If the issue is poor drainage, a broken irrigation zone, heavy shade, or turf that is not suited to the location, aeration alone will not deliver lasting change. The right provider should be honest about that trade-off and recommend the services that will make the biggest difference.

How to Choose the Right Local Aeration Provider

When you are comparing companies, look beyond the lowest quote. Aeration equipment and labor matter, but so does the provider’s ability to recognize the lawn conditions that caused the problem. A quick pass with a machine may create holes in the turf, but it does not automatically create a healthier lawn.

Choose a company that understands local grass types, offers clear recommendations, and can explain what should happen before and after the service. Ask whether they inspect irrigation, whether they work around landscape features, and what aftercare they recommend. You should also receive straightforward pricing and a realistic explanation of what results to expect.

A full-service local team can be especially helpful when aeration reveals a larger issue. If your lawn also needs mowing adjustments, weed control, irrigation repair, mulch installation, drainage attention, or landscape cleanup, coordinating those services through one dependable provider can save time and keep the plan consistent.

American Blade Lawn Care provides customized lawn care for homeowners and property owners throughout St. Augustine, Jacksonville, and nearby areas. Our team looks at the condition of the grass, soil, irrigation, and high-use areas to recommend practical services that fit the property – not a generic package.

What to Do After Lawn Aeration

After aeration, keep foot traffic light for a few days when possible and allow the soil plugs to break down naturally. Continue watering based on the season, recent rainfall, and your irrigation system’s coverage. The goal is steady moisture that supports recovery, not constant overwatering.

Avoid making dramatic changes all at once. If you are adjusting fertilization, mowing height, weed control, or irrigation, those decisions should work together. Cutting grass too short, watering shallowly every day, or ignoring an irrigation repair can undermine the benefits of aeration.

A healthier lawn rarely comes from one isolated service. It comes from consistent care that supports roots, protects the turf during Florida weather, and addresses problems before they spread. If your lawn feels compacted, looks uneven, or simply is not responding to your usual routine, request a free evaluation and get a clear recommendation for what your yard needs next.