10 Landscape Makeover Examples for Florida Yards

10 Landscape Makeover Examples for Florida Yards

A Florida yard can go from tired to sharp-looking without tearing out everything and starting over. The best landscape makeover examples solve the problems homeowners see every day: thin grass, washed-out beds, weeds around shrubs, poor drainage, broken sprinklers, and surfaces that make the whole property look neglected.

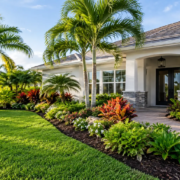
For St. Augustine and Jacksonville-area homes, a successful makeover has to do more than look good for a weekend. It needs to stand up to heat, heavy rain, sandy soil, humidity, and long growing seasons. Here are 10 practical transformations that can improve curb appeal while making your outdoor space easier to maintain.

Landscape Makeover Examples That Fit Northeast Florida

1. From patchy lawn to a healthier, more even yard

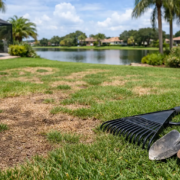
A patchy lawn is often blamed on the grass, but the real issue may be mowing height, compacted soil, poor irrigation coverage, weed pressure, or the wrong care plan for the turf type. A lawn makeover may begin with aeration, weed control, proper mowing, and irrigation adjustments rather than immediate replacement.

For a yard with St. Augustine grass, keeping the grass cut too short can create stress and leave room for weeds. In other yards, bare spots near trees may come from shade and root competition. The right fix depends on what is happening below the surface, not just what is visible from the street.

2. From faded planting beds to crisp mulch borders

Old mulch beds can make even a well-kept lawn look unfinished. Mulch fades quickly under Florida sun, and bed lines tend to disappear as grass creeps into the landscape.

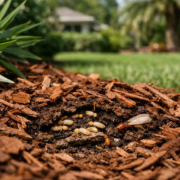
A simple makeover includes redefining the bed edge, removing weeds, trimming shrubs, refreshing the soil as needed, and installing a clean layer of mulch. Dark brown, natural, or pine bark mulch can give a home a more polished appearance while helping soil retain moisture. The key is not piling mulch against tree trunks or plant stems, which can trap moisture and invite problems.

3. From overgrown shrubs to balanced foundation plantings

When hedges cover windows, crowd walkways, or grow past the roofline, the home can look smaller and darker than it really is. This is one of the most noticeable makeover opportunities because trimming immediately changes the shape of the property.

A professional trim should do more than shear every shrub into a box. The goal is to remove overgrowth, improve airflow, preserve healthy growth, and restore a balanced shape that fits the home. Some older shrubs may be worth rejuvenating with selective pruning, while others may be better replaced with lower-maintenance varieties. It depends on the plant’s condition, mature size, and location.

4. From dry spots to reliable irrigation coverage

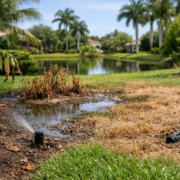
A lawn with green areas beside brown areas usually has a water problem before it has a grass problem. Broken sprinkler heads, clogged nozzles, poor zone coverage, leaks, and incorrect timer settings can all waste water while leaving turf thirsty.

An irrigation-focused makeover starts with an inspection of the entire system. Heads may need to be raised, adjusted, replaced, or moved to reach the right areas. A properly functioning system supports a healthier lawn and helps protect the investment made in mulch, shrubs, and new plantings. It also prevents the common problem of spraying sidewalks and driveways instead of the landscape.

5. From a stained driveway to a cleaner front entrance

The landscape does not stop at the grass line. Mildew, algae, dirt, and leaf stains on a driveway or walkway can pull attention away from an otherwise attractive home.

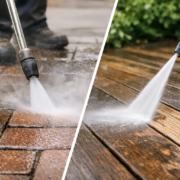
Power washing is one of the fastest ways to make an entrance look cared for. Cleaning the driveway, sidewalks, front porch, and patio creates contrast with fresh lawn edges and newly mulched beds. For homeowners preparing to sell, this is often a smart improvement because it makes the property feel maintained before visitors even reach the front door.

Makeovers That Improve How the Yard Works

6. From awkward open space to a useful outdoor area

Some yards have plenty of square footage but no clear purpose. A bare section beside the patio, a muddy path to the gate, or a worn strip near the pool can be transformed with practical hardscape improvements.

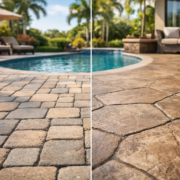
Pavers, stepping stones, gravel areas, edging, or a small seating pad can create a defined destination and reduce wear on the lawn. Hardscape work needs careful planning in Florida because drainage matters. A surface that looks level but sends water toward the home is not an upgrade. Proper grading and material selection make the difference between a feature that lasts and one that shifts, puddles, or becomes difficult to maintain.

7. From constant weeds to manageable landscape beds

Weeds can take over a landscape bed quickly after summer rain. Many homeowners keep pulling them, only to see new growth a week later. The better makeover is a combination of cleanup, weed control, healthy mulch depth, and ongoing maintenance.

This approach addresses both the visible weeds and the conditions that allow them to return. Beds should also be designed with enough room around plants so crews can maintain them without damaging shrubs or groundcover. A lower-maintenance design is often more valuable than a complicated landscape that looks great only when it receives constant attention.

8. From poor drainage to a yard that handles heavy rain

Standing water after a storm is common in Northeast Florida, but it should not become a permanent part of the lawn. Repeated puddling can damage turf, encourage mosquitoes, wash mulch away, and make parts of the yard unusable.

A drainage makeover may involve correcting low spots, redirecting downspouts, adjusting grades, or selecting plants that can tolerate occasional wet conditions. In some cases, the answer is not a major construction project. Small changes in soil elevation and water flow can make a noticeable difference. The right approach depends on where the water begins, where it collects, and how close the problem area is to the house.

9. From mismatched plantings to a more intentional design

Many established yards have plants added over several years with no overall plan. One shrub may be too large for its space, another may need more sun, and colorful plants may disappear against a busy background.

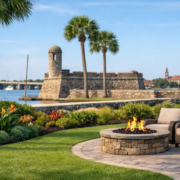
A landscape design makeover brings order to those pieces. This does not always mean replacing every plant. It may mean removing a few underperformers, grouping plants with similar watering needs, adding focal points near the entry, and choosing varieties that fit the available light. A well-designed landscape should look good from the curb while still leaving access for mowing, trimming, irrigation repairs, and routine service.

10. From high-maintenance curb appeal to a dependable care plan

The strongest makeovers are protected by regular maintenance. Fresh mulch, clean edges, healthy grass, and neatly trimmed shrubs will not stay that way if mowing is inconsistent or irrigation issues go unnoticed.

For many homeowners, the final stage of a makeover is putting the property on a customized maintenance schedule. Regular mowing, edging, hedge trimming, weed control, and seasonal checks keep small issues from becoming expensive projects. American Blade Lawn Care can combine recurring lawn care with project work, so homeowners do not have to coordinate separate crews for every part of the yard.

Choosing the Right Makeover for Your Property

Start with the issue that affects your property most. If the lawn is thin and brown, assess irrigation and turf health before spending money on decorative upgrades. If the lawn is healthy but the property still looks dated, fresh bed edges, mulch, trimming, and power washing may create the biggest visual change for the budget.

It also helps to think about how you use the yard. Families may need durable play areas and clear paths. Retirees may prefer lower-maintenance plantings and dependable irrigation. Property owners preparing for a sale may focus on the entry, lawn edge, driveway, and front beds because those details shape first impressions.

The best landscape makeover is not necessarily the largest one. It is the one that solves the right problems, suits the Florida climate, and gives you a yard you are proud to come home to. A free property evaluation can turn those rough ideas into a realistic plan built around your lawn, your budget, and the way you want your outdoor space to look.
Why Is My Lawn Patchy? Florida Causes and Fixes

Why Is My Lawn Patchy? Florida Causes and Fixes

A lawn can look green from the street and still have frustrating thin spots, bare circles, and mismatched color up close. If you are asking, “why is my lawn patchy,” the answer is usually not simply that it needs more water or fertilizer. In St. Augustine, Jacksonville, and throughout Northeast Florida, patchy turf often points to a specific issue with irrigation, mowing, soil, pests, shade, or the grass itself.

The good news is that most patchy lawns can improve when the real cause is identified first. Throwing seed, fertilizer, or extra water at every bare spot can waste money and sometimes make the problem worse.

Why Is My Lawn Patchy in Northeast Florida?

Florida lawns work harder than lawns in many other parts of the country. Our long growing season, intense summer rain, sandy soils, humidity, and occasional cold snaps all affect turf health. St. Augustine grass, Bermuda grass, zoysia, and bahia grass each respond differently to those conditions.

A patchy lawn may have one cause or several. For example, an irrigation head may miss part of the yard, leaving grass stressed. That weakened turf can then become more vulnerable to chinch bugs, weeds, or disease. The fastest path to a fuller lawn is to look for the pattern behind the damage.

Uneven irrigation coverage

Irrigation problems are one of the most common reasons a lawn becomes thin or patchy. A sprinkler head may be clogged, tilted, buried by turf, broken, or aimed at the driveway instead of the grass. In some yards, one zone runs too briefly while another section gets soaked every time it comes on.

Dry areas typically look gray-green before turning brown, and the grass may feel crunchy underfoot. Overwatered areas can also thin out, especially in humid weather, because constantly wet soil encourages fungal problems and weak root growth.

Do not assume your irrigation system is working because it turns on. Run each zone during daylight and watch it closely. Look for missed strips, weak spray, runoff, and heads that spray shrubs, sidewalks, or the side of the house. A repaired or properly adjusted system often makes a visible difference within a few weeks during the growing season.

Too much shade for the grass type

A mature oak canopy can make a Florida property beautiful, but it can also create a difficult growing environment. Grass needs enough sunlight to produce energy and recover from mowing, foot traffic, heat, and pests. St. Augustine grass handles partial shade better than Bermuda, but even St. Augustine will struggle under dense tree cover.

Shade is not only about sunlight. Tree roots compete with turf for moisture and nutrients, while falling leaves can trap moisture and block light. If bare spots consistently appear under the same trees or along the north side of the home, changing your mowing or fertilizer schedule alone will not solve the problem.

Sometimes selective pruning can improve light and airflow. In heavily shaded areas, a mulch bed, shade-tolerant plants, or another landscape solution may be more reliable than repeatedly replacing grass that cannot thrive there.

Compacted soil and thatch buildup

Foot traffic, heavy mowing equipment, construction activity, and naturally sandy or compacted areas can prevent water, air, and nutrients from reaching the root zone. Grass in those areas may remain thin even when the rest of the lawn receives proper care.

Thatch is another concern. It is the layer of dead stems and organic material between green grass blades and the soil surface. A small amount is normal, but excessive thatch can keep moisture and fertilizer from reaching roots effectively. St. Augustine grass can develop thatch when it is overfertilized, overwatered, or cut improperly.

Aeration can help in suitable lawns by opening the soil and encouraging stronger root development. Whether aeration is the right move depends on the grass type, soil condition, and source of the thinning. A lawn evaluation should come before any major treatment so the work matches the actual problem.

Mowing too low or with dull blades

Scalping is a common cause of patchy turf, especially when a lawn grows too tall between cuts and then gets cut down aggressively. Removing too much leaf blade at one time shocks the grass, exposes soil to heat, and creates opportunities for weeds to take over.

St. Augustine grass generally needs a higher mowing height than Bermuda grass. Cutting every lawn at the same setting is a recipe for uneven results. Dull mower blades create another problem by tearing rather than cleanly cutting the grass. The damaged blade tips turn brown, making the lawn look unhealthy even when the roots are still sound.

A consistent mowing schedule, proper mower height, and sharp blades help turf stay dense. Regular edging also keeps grass from creeping into beds and hardscape areas, giving the whole property a cleaner, more cared-for appearance.

Chinch bugs, grubs, and lawn disease

In St. Augustine lawns, chinch bugs can cause fast-moving patches of yellowing or brown grass, often beginning in hot, sunny areas near pavement. The damage can resemble drought stress, but watering more will not eliminate the insects. If the edges of a damaged patch continue expanding while nearby turf declines, pest activity should be considered.

Grubs feed below the surface and can weaken roots, causing turf to lift easily from the soil. Sod webworms and other insects can also create irregular thinning. The right treatment depends on identifying the pest correctly. Applying an insect treatment without a confirmed issue is not a smart long-term lawn care strategy.

Fungal disease is also common during warm, wet stretches. Large patch and gray leaf spot can affect St. Augustine grass, while other diseases may show up after extended rainfall or poor drainage. Fungus often creates circular or irregular discolored areas, but the pattern can vary. Reducing excess moisture, improving airflow, and using the right lawn treatment can prevent a small issue from spreading across the yard.

Weeds are filling gaps, not causing all of them

Weeds are often blamed for a patchy lawn, but they are usually a symptom of thin turf rather than the original cause. When grass loses density because of shade, pests, poor mowing, or irrigation issues, weeds gain open space to establish themselves.

A targeted weed control plan can help reclaim the lawn, but it needs to be paired with corrections to the underlying condition. Otherwise, weeds may disappear temporarily only to return in the same weak areas later.

How to Tell What Is Causing the Patchiness

Start by paying attention to where and when the patches appear. Damage that follows sprinkler zones suggests an irrigation concern. Thin grass under trees points toward shade and root competition. Brown areas that develop in full sun during hot weather may involve chinch bugs, drought stress, or mowing damage.

Check the soil beneath a weak section. Is it powdery dry, soggy, packed hard, or covered by a thick thatch layer? Tug gently on the grass. Turf that comes up easily may have root damage from grubs or disease. Also compare the troubled area with healthy grass nearby. Differences in mowing height, water coverage, sunlight, or soil level can reveal more than the color of the blades alone.

Photos taken every week can be useful, especially during summer. They show whether the patch is spreading, improving, or staying in one place. This information makes a professional lawn evaluation more accurate and helps avoid unnecessary treatments.

What Actually Helps a Patchy Lawn Recover

Recovery starts with correcting the source of stress. If irrigation is uneven, repair and adjust the system before increasing water use. If the lawn is being cut too short, raise the mower height and maintain a dependable schedule. If drainage is poor, address the water issue before adding fertilizer or new sod.

Fertilizer can support recovery, but timing and product choice matter. A stressed, diseased, or insect-damaged lawn will not be fixed by more fertilizer. In some cases, excess nitrogen encourages fast top growth while roots remain weak. Florida turf responds best to a customized program based on the grass type, season, soil, and current condition.

Bare areas may need plugs, sod, or other restoration after the underlying problem is handled. Seeding is not the best answer for every Florida lawn, particularly for common St. Augustine varieties that are typically established with sod or plugs. A good repair should blend with the existing turf and have the water, sunlight, and root conditions needed to survive.

For homeowners who want a clear answer instead of trial and error, American Blade Lawn Care can evaluate the lawn, irrigation, mowing needs, and surrounding landscape conditions as one connected system. That approach helps protect your investment and gives each part of the property the attention it needs.

A patchy lawn is your yard asking for a closer look. Address the reason behind the bare spots now, and you can give the grass a real chance to grow back thicker, greener, and easier to maintain.

Irrigation Pipe Replacement for Florida Lawns

Irrigation Pipe Replacement for Florida Lawns

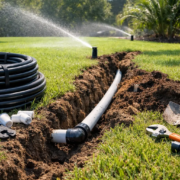
A sprinkler head that barely pops up, a soggy spot that never dries, or grass that turns brown in one strip while the rest of the yard stays green can point to the same hidden issue: damaged irrigation piping. Irrigation pipe replacement is not always the first fix a homeowner expects, but it can be the right move when repeated leaks and weak water pressure are keeping a Florida lawn from getting the consistent care it needs.

In St. Augustine, Jacksonville, and surrounding Northeast Florida communities, irrigation systems work hard for much of the year. Sandy soil, summer heat, frequent rain, tree roots, lawn equipment, and shifting ground can all take a toll on underground lines. A professional inspection helps separate a simple repair from a pipe problem that will keep coming back.

Signs Your Irrigation Pipes May Be Failing

A broken pipe is not always obvious. Because most irrigation lines are underground, the first clues usually show up in the lawn or in the way the sprinkler system performs. Water pooling near a valve box, a soft or sunken area in the yard, and unexplained muddy patches are common warning signs.

You may also notice one zone that has low pressure while other zones operate normally. Sprinkler heads may sputter, fail to rise fully, or spray only a short distance. That does not automatically mean the heads are bad. A cracked pipe, loose fitting, or crushed section of line can reduce the water reaching every head in that zone.

A higher water bill is another reason to take a closer look. Florida lawns need water at certain times of year, but an abrupt increase in usage without a change in your watering schedule may mean water is escaping below the surface. Leaving that leak alone can waste water, weaken turf, and create an inviting environment for weeds and disease.

Repeated repairs in the same area deserve attention as well. Replacing a fitting once is normal. Digging up the same zone every few months is a sign that the surrounding pipe may be brittle, improperly supported, damaged by roots, or nearing the end of its useful life.

When Irrigation Pipe Replacement Makes More Sense Than Repair

The best solution depends on the location and extent of the damage. A single clean break in an otherwise sound PVC line can often be repaired quickly. There is no reason to replace a long stretch of pipe if a targeted repair will restore dependable operation.

Replacement becomes the better value when the pipe has multiple cracks, the material has become fragile, or past repairs have created a patchwork of weak spots. Old pipe can split under normal pressure changes, especially when it has been stressed by roots or soil movement. Replacing the compromised section gives the system a stronger foundation instead of asking the next weak point to hold.

The pipe location matters, too. A leak beneath a driveway, patio, mature landscape bed, or hardscape feature may require more planning than a leak in open turf. In some cases, rerouting a line around an obstacle is more practical than repeatedly disturbing finished areas. A qualified irrigation technician can evaluate access, pipe depth, system layout, and the condition of nearby components before recommending the least disruptive option.

For homeowners, the goal is not simply to stop water from leaking today. It is to restore even coverage and avoid spending money on repairs that do not last. That is why a thorough inspection should come before any major irrigation pipe replacement work.

Florida Soil and Roots Create Different Challenges

Northeast Florida’s sandy soil drains quickly, which can make underground leaks harder to spot at first. Water may disappear into the ground rather than forming a large puddle. At the same time, erosion around a leaking pipe can leave voids under turf or landscape edging, creating uneven areas that become more noticeable over time.

Tree roots are another local concern. Roots naturally seek moisture, and a small leak can attract them to an irrigation line. Once roots press against or grow around a pipe, they can create cracks, shift fittings, and make future repairs more difficult. Cutting roots without considering the health and stability of the tree is not a good long-term plan. The right repair may involve replacing damaged pipe and adjusting the route where possible.

What a Professional Pipe Replacement Visit Should Include

Reliable irrigation work starts with finding the true source of the problem. A visible wet spot is helpful, but water can travel along a trench or low area before it reaches the surface. The actual break may be several feet away.

A professional service visit should include testing the affected zone, checking sprinkler pressure and coverage, inspecting accessible valves and connections, and locating the damaged portion of pipe as accurately as possible. Once the issue is confirmed, the technician can expose only the area needed for repair or replacement, rather than unnecessarily tearing up the yard.

After the new pipe and fittings are installed, the zone should be tested again. This step verifies that the repair holds under pressure and that nearby heads are spraying correctly. Replacing a damaged line without checking the rest of the zone can leave a homeowner with a repaired pipe but poor lawn coverage caused by a clogged nozzle, broken head, or misaligned sprinkler.

The work should also include restoring the disturbed area as neatly as conditions allow. Freshly repaired turf may need time to settle and recover, especially during hot weather. A good irrigation contractor will explain what was repaired, what to watch for, and whether any adjustments to the watering schedule are needed while the lawn recovers.

Protecting Your Lawn After Pipe Work

Once the system is operating properly, take a few minutes each month to run every irrigation zone and watch it work. Look for heads spraying onto sidewalks, water bubbling from the ground, weak streams, or dry areas between sprinkler patterns. Catching a minor issue early is easier on your lawn and your budget.

Keep sprinkler heads clear of mulch, grass clippings, and soil. When beds are refreshed with mulch or new plants are installed, irrigation lines and heads can be covered, bumped, or accidentally cut. Let your lawn and landscape provider know where work is planned so the irrigation system can be protected.

It also helps to avoid setting the timer and forgetting it. Seasonal conditions change quickly in Florida. Summer rain may reduce watering needs, while dry stretches can expose coverage gaps. Overwatering is not a substitute for a properly functioning system. It can create shallow roots, encourage fungus, and leave your yard looking worse even while using more water.

Repairing the System Is Only Part of Lawn Health

A healthy lawn depends on more than working sprinklers. Grass type, sun exposure, soil condition, mowing height, drainage, and weed pressure all affect how the yard responds after an irrigation repair. A zone that appears to have a pipe problem may also have compacted soil or turf that is struggling for another reason.

That is why an all-in-one local approach can make a real difference. American Blade Lawn Care can assess the irrigation issue while keeping the bigger picture in view: how water is reaching the grass, whether the landscape is draining correctly, and what the lawn needs to recover its color and thickness.

If your sprinkler system is leaving wet spots, dry patches, or weak coverage behind, do not wait for a small underground leak to become a larger lawn problem. A prompt inspection and a clear recommendation can protect your water, your turf, and the curb appeal you work hard to maintain.

Pavers Versus Stamped Concrete for Florida Yards

Pavers Versus Stamped Concrete for Florida Yards

A patio can look great on installation day and still become a costly headache a few summers later. In Northeast Florida, sun, heavy rain, humidity, shifting soil, and pool water all put hardscapes to work. When homeowners compare pavers versus stamped concrete, the better choice is usually the one that fits the yard’s drainage, use, budget, and long-term maintenance expectations – not just the first price on the estimate.

For St. Augustine and Jacksonville-area properties, both materials can create a clean, finished outdoor space. The difference is how they handle the realities beneath and around them.

Pavers Versus Stamped Concrete: The Main Difference

Pavers are individual manufactured stones installed over a compacted base and bedding sand, with joint sand between each piece. They can resemble natural stone, brick, travertine, or a clean contemporary surface depending on the style and color selected.

Stamped concrete is a continuous concrete slab poured in place, then textured and colored to resemble materials such as stone, slate, brick, or wood. It offers a custom look without installing separate units across the entire patio, walkway, or pool deck.

That construction difference matters. A paver surface has joints and individual pieces that can be adjusted or replaced. A stamped concrete surface is one connected slab. It can be beautiful and durable, but when the slab shifts or cracks, the repair is more visible and often more involved.

Florida Weather Changes the Decision

Our local climate is hard on exterior surfaces. Summer heat can make bare hardscapes uncomfortable, afternoon rain can expose drainage problems quickly, and sandy or settling soil can create uneven areas over time. Salt air is also a factor for many coastal St. Augustine properties.

Pavers generally respond well to minor movement because the surface is made of separate pieces. If a small section settles, a professional can lift the affected pavers, correct the base, and reinstall them. This makes pavers a practical option for yards with drainage concerns, tree roots nearby, or areas where soil movement is likely.

Stamped concrete requires carefully planned control joints to help manage cracking as the slab expands and contracts. Those joints are normal, but they do not guarantee a crack-free surface. Small hairline cracks may be acceptable to some homeowners, while others see them as a major drawback on a decorative patio.

Neither material fixes poor drainage on its own. Water should move away from the home, avoid collecting along pool decking, and have a planned path through the landscape. Before choosing a surface, look at where roof runoff lands, whether downspouts discharge onto the patio area, and how water behaves after a hard Florida rain.

Appearance and Design Flexibility

Stamped concrete creates a more continuous, custom-looking field. It works well for homeowners who want a broad, unified patio with the visual character of stone at a lower installation cost than many natural materials. Color hardeners, stains, borders, and stamp patterns allow for plenty of design options.

The trade-off is realism. High-quality stamped concrete can look attractive, but it may not have the depth, individual variation, or high-end texture of real stone or well-chosen pavers. Repeating patterns can also become noticeable across a large area.

Pavers offer more visual dimension from the start. They can be laid in running bond, herringbone, basketweave, or other patterns, and borders can define seating areas, walkways, fire pit spaces, or transitions to a driveway. They are especially effective when a project needs to tie together landscaping, mulch beds, outdoor lighting, and a pool area.

Color selection deserves more attention than many homeowners give it. Very dark surfaces can hold heat in direct sun. Light colors are usually more comfortable underfoot, particularly around pools, but they may show dirt, leaves, and irrigation stains more easily. The right choice balances the home’s exterior, the amount of shade, and the daily use of the space.

Upfront Cost Is Only Part of the Price

Stamped concrete often has a lower upfront cost than a paver installation, particularly for a simple patio with easy access and limited site preparation. It can be a good fit when budget is the primary concern and the area has stable conditions, solid drainage, and a straightforward design.

Pavers usually cost more initially because installation requires excavation, base preparation, compaction, edge restraints, sand, and detailed placement. However, that preparation is also a major part of why a paver installation can perform well over time. A properly built base is not the place to cut corners.

Long-term costs can shift the comparison. Stamped concrete typically needs periodic cleaning and resealing to preserve color and protect the finish. If it cracks, repairs may reduce the problem but rarely make it disappear completely. Matching older colors and stamped textures is difficult.

Pavers also need care. Joint sand can wash out, weeds can appear where organic debris settles, and some areas may need re-leveling after years of use. Still, replacing a stained, chipped, or damaged paver is usually far more contained than repairing a damaged concrete slab. For many homeowners, that repair flexibility is worth the higher initial investment.

Maintenance Requirements for Each Surface

Both options benefit from routine cleaning. Florida humidity encourages mildew, algae, and surface staining, especially on shaded patios and north-facing walkways. Regular sweeping removes leaves and debris that can trap moisture, while appropriate power washing can restore a cleaner appearance without causing unnecessary damage.

Stamped concrete should be resealed on a schedule that matches its exposure and traffic. A pool deck, sunny patio, or frequently used entertaining area may need more regular attention than a covered walkway. The sealer helps protect the color and surface, but overly slick finishes should be avoided around pools and entryways.

Pavers can be sealed, but sealing is not always required. It can enhance color, help resist stains, and stabilize joint sand when the correct products and methods are used. The joints may need replenishing over time, particularly after heavy rain or pressure washing. Professional cleaning and sand replacement keep the surface looking finished and help discourage weed growth.

Be cautious with aggressive pressure washing on either material. Too much pressure can strip a concrete finish, damage sealer, or remove paver joint sand. The goal is a clean surface, not a surface that has been blasted apart.

Pool Decks, Patios, and Walkways Have Different Needs

For a pool deck, foot comfort and slip resistance should be high on the list. Lighter pavers often perform well because joints can provide some texture, and individual units make future repairs less disruptive. Stamped concrete can also work around a pool when properly finished and sealed with a slip-resistant product, but surface temperature and cracking are concerns worth discussing before installation.

For a front walkway, stamped concrete can provide a neat, budget-conscious upgrade with a cohesive appearance. Pavers are often the stronger choice when the walkway needs curves, decorative borders, or a connection to a driveway or front landscape bed.

For a backyard entertaining patio, the decision often comes down to how long the homeowner plans to stay and how polished they want the space to feel. A stamped concrete patio can deliver a dramatic improvement quickly. A paver patio can provide a more detailed, adaptable surface that supports future changes, such as adding a fire pit, outdoor kitchen, seating wall, or landscape lighting.

When Pavers Are Usually the Better Choice

Pavers are often the stronger investment for homeowners who expect soil movement, want easier spot repairs, or plan a more detailed outdoor living space. They are also a smart option where drainage needs to be addressed carefully, provided the base and grade are designed correctly.

Choose pavers when long-term flexibility matters more than the lowest upfront price. Their modular design is particularly valuable when irrigation lines, lighting wires, or future landscape work may require access beneath or beside the hardscape.

When Stamped Concrete Makes Sense

Stamped concrete can be the right call for a homeowner who wants a large, attractive surface at a more controlled initial cost. It works best when the site has stable preparation, proper grading, and a realistic understanding that decorative concrete may develop cracks over time.

It is also a practical choice for simple patio shapes where a continuous appearance suits the home. The key is working with an installer who prepares the base correctly, places joints thoughtfully, and uses finishes appropriate for Florida moisture and foot traffic.

A hardscape should make the rest of the property easier to enjoy, not create another maintenance problem. Before committing to a pattern or color, have the yard evaluated as a whole – including irrigation, drainage, nearby trees, landscape beds, and how your family actually uses the space. American Blade Lawn Care can help homeowners plan outdoor improvements that look right on day one and continue to work with the property for years to come.

Sod vs Seed Florida: Which Lawn Choice Wins?

Sod vs Seed Florida: Which Lawn Choice Wins?

A bare patch after a hot Northeast Florida summer can make a homeowner ask one practical question: sod vs seed Florida – which one will actually produce a lawn worth looking at? The answer is rarely as simple as choosing the cheaper option. In St. Augustine, Jacksonville, and nearby communities, grass type, irrigation, soil condition, shade, timing, and how quickly you need results all matter.

For many local properties, sod is the clear path to an immediate, uniform lawn. Seed can make sense in certain situations, but it is not a reliable replacement for sod when you want to establish the warm-season grasses that perform best in our climate. A good decision starts with the yard in front of you, not a one-size-fits-all rule.

Sod vs Seed in Florida: The Main Difference

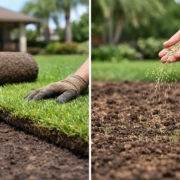
Sod is mature turfgrass that has been professionally grown, cut into pieces, delivered, and installed over prepared soil. It gives your property green coverage right away, protects exposed soil, and starts developing roots as it settles into the yard.

Seed requires more patience. The lawn must germinate, fill in, and become strong enough to handle heat, foot traffic, mowing, weeds, and Florida rain. That process can be worthwhile for grass varieties that establish well from seed, but it comes with more uncertainty.

The biggest difference for Florida homeowners is the type of grass available. St. Augustinegrass, a popular choice across St. Augustine and coastal Northeast Florida, is generally established by sod, plugs, or sprigs rather than seed. If your goal is a full St. Augustine lawn, sod is usually the practical choice.

Bahiagrass and some Bermuda varieties can be seeded. Those grasses have different strengths, appearances, and maintenance needs. Bermuda handles sun and traffic well but needs plenty of direct sunlight and regular mowing. Bahiagrass is hardy and lower-input, but its coarser texture and tall seed heads are not every homeowner’s idea of a polished residential lawn.

When Sod Is the Better Choice

Sod is the right fit when you need a finished appearance quickly or when you are replacing a lawn with St. Augustinegrass, Zoysia, or another grass that is not commonly established from seed. It is especially useful after major landscape work, irrigation repairs, drainage corrections, construction damage, or a full lawn renovation.

A newly sodded yard also gives weeds less room to take over than an open, freshly seeded area. That matters in Florida, where weeds can move fast after rain and warm temperatures. Sod does not eliminate weed pressure, but dense, healthy turf is a far better starting point than thin seedlings competing with crabgrass, dollarweed, and broadleaf weeds.

Appearance is another advantage. Fresh sod creates a consistent color and texture that can improve curb appeal almost immediately. For homeowners preparing to sell, welcoming guests, finishing a pool project, or simply tired of looking at dead patches, that quick transformation carries real value.

Sod does require careful installation and follow-through. The ground needs to be cleared, graded, and prepared so the roots can contact healthy soil. Poorly installed sod can fail just as quickly as a poorly seeded lawn. It also needs frequent watering during its first few weeks, then a gradual transition to a deeper, more efficient watering schedule as roots establish.

Cost is usually the main trade-off. Sod costs more upfront because you are paying for mature grass, delivery, soil preparation, installation, and early-care needs. Still, homeowners should compare the full cost of success, not just the initial price. Multiple rounds of seed, weed control, erosion repair, and extra watering can narrow the gap when a seed project struggles.

Best times to install sod locally

Spring through early fall is generally the strongest window for sod installation in Northeast Florida. Warm temperatures help warm-season turf root and grow. Installation is possible outside that window when conditions are right, but sod laid during cooler months establishes more slowly and needs closer attention.

Summer installation can work very well with working irrigation, but it is not a set-it-and-forget-it project. High heat can stress new sod quickly if watering is uneven. Before installation, make sure sprinkler coverage reaches every section of the lawn. Dry corners, broken heads, and overspray onto driveways are small problems that become expensive once new turf is down.

When Seeding Can Make Sense

Seeding is most reasonable when you are planting a grass variety that grows reliably from seed and your timeline is flexible. A sunny, open area suited to Bermuda may be a candidate, particularly if you are comfortable giving it regular attention during establishment. Bahiagrass seed can also fit larger, more natural-looking properties where a fine, manicured lawn is not the priority.

Seed is often less expensive at the start, and it can be useful for filling appropriate grass types over a large area. But it demands consistency. The seedbed must stay evenly moist during germination, which can mean light, frequent watering. Heavy rain can wash seed away, birds can disturb it, and a missed watering cycle during hot weather can set the project back.

Seed also asks homeowners to be patient with visual results. Germination does not mean the lawn is ready. Young grass needs time to thicken before it can handle normal mowing and foot traffic. In a busy household with children, pets, or frequent outdoor use, protecting a seeded area can be difficult.

Avoid treating grass seed as a universal repair tool. Spreading generic seed over thin St. Augustinegrass will not restore a St. Augustine lawn. It may create a mismatched lawn or simply leave you with more weeds. First identify the grass already growing in your yard and the reason it declined.

Your Yard May Need More Than New Grass

A lawn that keeps dying in the same places has a cause. Adding sod or seed without solving that cause can leave you right back where you started. In our area, common problems include irrigation gaps, poor drainage, shade from mature trees, compacted soil, chinch bug damage, disease, mowing too low, and improper fertilizer use.

Shade deserves special attention. Most turfgrass needs sunlight to stay dense. St. Augustinegrass tolerates more shade than Bermuda, but no grass performs well in deep shade all day. If a section receives limited sun because of large oaks or a home addition, a landscape bed, mulch area, or shade-tolerant ground cover may be a better long-term investment than repeatedly replacing grass.

Drainage matters, too. Standing water after heavy rain can weaken roots and invite disease. On the other hand, sandy soil dries quickly and may reveal irrigation problems before the rest of the lawn shows stress. A lawn evaluation should look at water movement, sprinkler coverage, soil conditions, and the existing grass before anyone recommends a replacement method.

How to Choose Between Sod and Seed

Start with your preferred grass type. If you want St. Augustine or Zoysia, sod is typically the answer. If Bermuda or Bahiagrass fits your property and expectations, seed may be an option.

Next, consider your schedule and your tolerance for risk. Sod offers fast coverage and a more predictable appearance when installed correctly. Seed takes longer, needs more hands-on attention, and is more vulnerable during the early stages. If you need a lawn that looks presentable soon, sod usually earns its higher upfront cost.

Then look at the irrigation system. Both methods need water, but new sod needs reliable coverage to root in, while seed requires very consistent moisture to germinate. If your system has broken heads, poor pressure, or areas that never receive enough water, address those issues first.

Finally, be honest about the site. Full sun, partial shade, pet traffic, drainage, tree roots, and soil compaction all influence the right choice. The best lawn is not the one that looks good on installation day. It is the one that can stay healthy through August heat, afternoon storms, and everyday family life.

Protecting Your Investment After Installation

Whether you choose sod or seed, proper early care determines the outcome. Keep equipment and heavy traffic off the area until the turf has rooted or seedlings have matured. Mow only when the grass reaches the proper height, use a sharp blade, and never remove too much of the leaf blade at one time.

New sod should be checked daily at first. Lift a corner gently after several days to see whether roots are beginning to grab the soil. As rooting improves, shift from frequent shallow watering to less frequent, deeper watering that encourages roots to grow down. Seeded areas need moisture near the surface during germination, followed by a gradual reduction in frequency as plants mature.

Fertilizer and weed control should also be timed carefully. Applying the wrong product too early can stress young turf or interfere with establishment. A locally tailored plan is safer than guessing, especially when you are working with a newly installed lawn and Florida weather that can change quickly.

For homeowners who want the fastest path to a full, healthy lawn, professionally installed sod paired with irrigation and ongoing maintenance is often the strongest choice. American Blade Lawn Care can evaluate the conditions in your St. Augustine-area yard and recommend the option that makes sense for your grass, budget, and goals. A lawn should not just look green for a week – it should be built to hold up season after season.

Does Mulch Attract Termites? Florida Yard Facts

Does Mulch Attract Termites? Florida Yard Facts

A fresh layer of mulch can make a St. Augustine landscape look finished in a single afternoon. It holds moisture, helps suppress weeds, and gives planting beds a clean, well-kept appearance. But does mulch attract termites? Not in the simple, automatic way many homeowners fear. Mulch can create conditions termites like, especially when it is installed too close to the house or kept consistently wet. The real concern is not mulch alone. It is moisture, wood-to-soil contact, and an easy hidden path to your home.

For Northeast Florida property owners, that distinction matters. Our humidity, frequent rain, warm temperatures, and sandy soils can support termite activity for much of the year. You do not need to give up attractive mulch beds. You do need a plan that protects both your landscape and your foundation.

Does Mulch Attract Termites or Create a Termite Risk?

Termites are always looking for food, moisture, and shelter. Most termite problems around Florida homes involve subterranean termites, which live in the soil and travel through protected pathways to reach wood. Wood mulch contains cellulose, the same basic plant fiber found in lumber and dead roots, so termites may move through it or feed on it. However, mulch is rarely the reason termites first arrive on a property.

A termite colony can forage across a broad area underground. If termites are already nearby, a moist mulch bed may provide cooler, more protected conditions as they search for food. Trouble develops when that mulch is piled against siding, covers foundation inspection areas, or stays soggy because of poor drainage or irrigation problems. In those situations, mulch can hide termite activity and make it easier for pests to reach structural wood without being noticed.

Think of mulch as a landscape material that needs proper placement, not as a termite magnet. Installed correctly, it remains one of the best ways to protect plant roots and improve curb appeal.

Why Florida Mulch Beds Need Extra Attention

St. Augustine and Jacksonville homeowners deal with a climate that is tough on lawns, planting beds, and exterior structures. Heavy summer rains can saturate beds. Irrigation zones may run longer than needed. Shade from mature trees can keep soil damp for days, while hot weather speeds up the breakdown of organic mulch.

As mulch decomposes, it can hold even more moisture near the soil surface. That is helpful around shrubs and flowers, but it is not helpful when the bed runs directly against a home’s exterior. A thick, wet layer near the foundation can also conceal mud tubes, damaged trim, and other early warning signs that deserve attention.

The goal is balance. Your landscaping should retain enough moisture for healthy plants while allowing water to move away from the home and leaving key foundation areas visible for inspection.

Mulch does not replace drainage correction

If water is collecting near your home, changing mulch types will not solve the bigger issue. Downspouts, grading, compacted soil, damaged irrigation heads, and overwatering can all keep a foundation bed too wet. Correcting those conditions protects the landscape and reduces the kind of moisture pests seek.

A properly adjusted irrigation system is especially important in Florida. Sprinklers should water turf and plants, not repeatedly soak the side of the house, fence, or wood trim.

How to Use Mulch Without Inviting Problems

The safest mulch strategy is simple: keep it moderate, keep it separated from the structure, and keep it dry enough to do its job without becoming waterlogged.

For most landscape beds, a mulch depth of about 2 to 3 inches is enough. Deeper is not always better. A heavy layer can trap too much moisture, limit oxygen around plant roots, and create a hiding place for pests. Before adding a new layer, check what is already there. Many beds become 5 or 6 inches deep after years of topping off mulch without removing old material.

Leave a clear gap between mulch and your home’s siding, door frames, and exterior trim. A strip of exposed soil, gravel, or another non-organic border near the foundation gives you a better view of the area and prevents mulch from bridging up to wood components. Do not allow mulch to touch stucco weep screeds or cover ventilation openings.

Around trees and shrubs, keep mulch pulled back from trunks and stems. Mulch volcanoes can hold moisture against bark, encourage disease, and attract pests to vulnerable plant material. A flat, even ring is far healthier than a mound piled high at the base.

Is One Mulch Type Better Than Another?

No mulch is completely termite-proof if it is installed against a home in a wet bed. Still, material choice can affect moisture retention, longevity, and appearance.

Pine bark and wood chips are common choices because they look natural and break down into the soil over time. They work well in planting beds when properly maintained. Cypress mulch is often promoted as pest-resistant, but it should not be treated as a termite barrier. Any wood-based mulch can become part of a favorable environment if it stays wet and contacts the structure.

Pine straw is widely used across Northeast Florida and can be an attractive option under trees and in natural-looking beds. It also needs attention around the foundation because it can hold moisture and obscure inspection areas.

Stone, gravel, or rubber mulch does not provide termites with wood fiber, but those materials have trade-offs. Rock can become very hot in full Florida sun, may complicate future planting, and can be difficult to remove. Rubber mulch can retain heat and does not improve soil as organic mulch does. For many homes, the best approach is not replacing every mulch bed with rock. It is using quality organic mulch where plants benefit from it and maintaining a clear inspection zone beside the house.

Signs Your Mulch Bed May Need Attention

A healthy mulch bed should look neat, smell earthy, and drain reasonably well after rain. It should not stay swampy, pile up against the exterior, or bury the lower edge of siding.

Take a closer look if you notice mulch consistently packed against the house, soft or damaged wood trim, bubbling paint, unexplained cracks in trim, or narrow mud tubes on the foundation. Mud tubes are shelter tunnels subterranean termites use to travel between the soil and a food source. If you see them, avoid disturbing the area until a licensed pest professional has evaluated it. Breaking a tube does not solve the problem and may make activity harder to confirm.

You should also watch for irrigation overspray, leaking spigots, clogged gutters, and downspouts that discharge directly into landscape beds near the foundation. These problems are common, fixable, and more meaningful than the presence of mulch alone.

A Better Approach to Mulch Installation

Good mulch work is about more than spreading material until the bed looks full. The bed should be cleaned, edged, and shaped so water flows as intended. Existing mulch should be assessed before more is added, and plant material should be kept clear at the base. Near the home, installers should preserve visibility around the foundation and avoid covering vents, utility access points, and drainage features.

This is where local experience pays off. A landscape plan that works in a dry climate may not work through a Florida summer. The right mulch depth can vary with sun exposure, soil, plant selection, drainage, and how your irrigation system is set up. A bed beneath live oaks may need a different approach than a sunny front entry with low-maintenance shrubs.

American Blade Lawn Care can help homeowners build and refresh mulch beds with the full property in mind – clean edges, healthy plant spacing, proper material depth, and a polished result that does not create avoidable concerns around the house.

Keep the Landscape Beautiful and the Foundation Visible

Mulch is not something to fear. It is a valuable part of a healthy, finished-looking yard when it is installed with care. Keep it a few inches deep, keep it back from the structure, correct moisture issues, and make termite inspections easy rather than hidden. That gives your plants the benefits of mulch while helping you spot small exterior issues before they become expensive repairs.

Landscape Design That Works in St. Augustine

Landscape Design That Works in St. Augustine

A beautiful yard in Northeast Florida has to do more than look good on the day it is installed. It needs to stand up to summer heat, sudden downpours, sandy soil, shade from mature trees, and, in some neighborhoods, salt air. The right landscape design accounts for those conditions from the beginning, so your property looks cared for without turning into a weekly headache.

For homeowners in St. Augustine and Jacksonville, the best results come from a plan built around the way you actually use your outdoor space. That may mean a cleaner front entry with defined planting beds, a backyard that gives the family room to gather, or a low-maintenance upgrade for a rental or second home. Good design connects curb appeal, lawn health, drainage, irrigation, and ongoing maintenance rather than treating each one as a separate project.

Start Landscape Design With the Property You Have

Every yard has strengths and limitations. A flat, sunny lot needs a different approach than a property with dense oak shade, standing water after storms, or an irrigation system that misses half the landscape bed. Before choosing plants, stone, or mulch color, take a close look at how the property performs throughout the day and after rainfall.

Sun exposure is one of the biggest deciding factors. A plant that thrives in full Florida sun can struggle beneath a canopy of live oaks, while a shade plant may burn out along a hot driveway or west-facing wall. Soil matters too. Much of our area has sandy soil that drains quickly and does not hold nutrients well, which can affect plant selection and watering needs.

Drainage deserves attention early. Water that pools near a foundation, runs across a walkway, or leaves turf thin and muddy will not be solved by adding more plants. Sometimes the answer is grading, a drainage improvement, a revised bed layout, or a more appropriate choice of groundcover. Addressing the underlying issue first protects the investment you make in the finished landscape.

Create a Landscape Design Plan Around Daily Use

Landscape design should make the property easier to enjoy and easier to maintain. A front yard often needs visual structure: clean bed lines, healthy turf, balanced shrubs, and an entry that feels welcoming from the street. A backyard may need privacy, open lawn for kids or pets, room around a patio, or plantings that soften a fence without swallowing the space.

Start by identifying the areas that matter most. If the front of the home feels plain, a refreshed foundation bed and properly scaled plant material may make a stronger impact than changing the entire yard. If the backyard is where you spend weekends, it may be worth prioritizing a patio edge, pathways, privacy screening, or hardscape features that define an outdoor living area.

Scale is where many DIY plans go wrong. Small shrubs placed too close together can look neat at first but become crowded within a few growing seasons. Oversized plants can hide windows, block walkways, and require constant trimming. A professional plan considers mature plant size, sightlines, access for maintenance, and enough spacing for healthy airflow.

Choose Plants for Florida Conditions, Not Just a First Impression

Florida-friendly plant choices do not mean every yard has to look the same. They mean selecting plants with a realistic chance of thriving in the available light, soil, and moisture conditions. The goal is a landscape with color, texture, and structure that does not depend on excessive watering or repeated replacement.

Evergreen shrubs can provide a dependable framework around the home, while flowering plants and seasonal color add interest where it counts. Ornamental grasses, palms, groundcovers, and native or adapted plant varieties can all have a place when selected for the right location. The best mix depends on your home’s architecture, the amount of maintenance you want, and whether the yard is sunny, shaded, exposed, or protected.

There are trade-offs. A landscape packed with seasonal flowers can deliver bright color, but it will require more frequent replacement and care. A plant-forward, low-maintenance design may rely more on foliage, mulch beds, and well-shaped shrubs. Neither approach is wrong. The right choice is the one that matches your expectations and the time you want to spend maintaining the property.

Use Mulch, Edging, and Hardscape to Add Definition

The details around your plantings have a major effect on the finished appearance. Fresh mulch helps retain moisture, moderates soil temperature, reduces weed pressure, and gives beds a clean, finished look. It also helps individual plants stand out instead of getting lost in bare soil or patchy grass.

Defined edges are just as important. Clean bed lines separate turf from planting areas, make mowing and trimming more efficient, and prevent a landscape from looking overgrown. Depending on the layout, edging materials, stone borders, pavers, or a simple professionally cut edge can create the right amount of structure.

Hardscape-related improvements can make a yard more functional as well as more attractive. A walkway can protect turf in a high-traffic area. A patio border can create a clearer transition between the house and the yard. Retaining features or stone accents may help organize a sloped or awkward space. These additions should support the property, not compete with it. Too much hardscape can make a smaller yard feel hot and crowded, while too little structure can leave an outdoor area feeling unfinished.

Make Irrigation Part of the Design, Not an Afterthought

A healthy landscape needs water in the right places and at the right times. That is especially true during dry stretches, but overwatering creates problems too. Saturated soil can encourage disease, waste water, and weaken plants that are not suited to constantly wet conditions.

Irrigation should be adjusted for different zones of the yard. Turf, new plantings, established shrubs, and shaded beds may all need different watering schedules. Sprinkler heads should reach their intended areas without soaking driveways or siding, and drip irrigation can be useful in planting beds where targeted watering is needed.

If plants repeatedly fail in one area, the answer may not be more water. It could be poor drainage, too much shade, damaged irrigation, compacted soil, or a plant that simply does not fit the site. A careful assessment can prevent the cycle of replacing the same plants year after year.

Plan for Maintenance From Day One

The most successful landscape is one that stays attractive after installation. That means choosing a design that can be maintained with regular mowing, edging, hedge trimming, weed control, mulch refreshes, and irrigation checks. A yard that looks great only when it is newly installed is not a practical long-term solution.

Ask how each part of the plan will be cared for. Will shrubs need frequent shaping? Can crews access the beds without stepping on plants? Is there enough open space for mowing? Are trees and larger plants far enough from the roof, fences, and utility areas? These practical questions protect both your budget and the appearance of the property.

American Blade Lawn Care approaches landscape projects with the full property in mind. When design, lawn maintenance, irrigation repair, mulch installation, and exterior cleanup work together, it is easier to keep the finished result looking sharp through every season.

A well-planned yard should give you a reason to enjoy pulling into the driveway, not another project waiting for the weekend. Start with the problems you want to solve, build around your property’s Florida conditions, and choose improvements that will still make sense after the plants have had time to grow.

Power Washing vs Pressure Washing: What’s Different?

Power Washing vs Pressure Washing: What’s Different?

A black streak on a roofline, green mildew on a patio, and tire marks across a driveway may look like the same kind of cleaning problem. They are not. When homeowners ask about power washing vs pressure washing, the real question is which method will remove the buildup without damaging the surface underneath. In St. Augustine and across Northeast Florida, that distinction matters because heat, humidity, salt air, shade, and frequent rain give algae and mildew plenty of opportunities to return.

Power Washing vs Pressure Washing: The Main Difference

Both services use pressurized water to clean exterior surfaces. The key difference is water temperature.

Pressure washing uses unheated water delivered at controlled pressure. It is highly effective for removing dirt, loose debris, algae, mildew, pollen, and many everyday exterior stains. For most residential cleaning jobs, it provides the right balance of cleaning power and surface protection.

Power washing uses heated water along with pressure. Hot water can break down greasy, oily, and stubborn grime more effectively than cold water alone. It is often the better choice for surfaces affected by automotive fluids, heavy grease, gum, or deeply embedded buildup.

The terms are often used interchangeably, and many homeowners use “power washing” to describe any exterior washing service. That is understandable. Still, the method should be chosen based on the material, the stain, and the condition of the property – not simply the name of the service.

Why Water Temperature Changes the Job

Think about washing a greasy pan. Cold water may rinse away loose residue, but warm water helps cut through oil. The same principle applies outdoors. Heated water can help lift petroleum-based stains and grease from concrete, commercial walkways, and work areas where vehicles or equipment have left residue behind.

That extra cleaning strength is useful, but it is not automatically better for every surface. Heat and excessive pressure can be hard on older concrete, painted finishes, vinyl, wood, certain sealers, and delicate masonry. The best approach is the least aggressive method that still produces a clean, lasting result.

For a typical Florida home, algae, mildew, pollen, and dirt are more common than grease. Those issues can often be handled effectively with the proper detergents, rinse technique, and carefully adjusted pressure. A professional evaluates what is growing or staining the surface before deciding how to clean it.

Which Method Works Best on Common Home Surfaces?

Every exterior material has limits. A driveway can tolerate a different cleaning approach than a screened patio, and a paver walkway needs different care than a painted porch ceiling.

Concrete Driveways and Sidewalks

Pressure washing is commonly used on concrete driveways, sidewalks, curbs, and patios. It removes surface dirt, muddy footprints, algae, and dark organic staining that can make concrete look neglected. When oil spots or greasy vehicle stains are present, heated power washing may help, especially when paired with the right cleaning solution.

Older concrete deserves extra care. High pressure held too close to the surface can leave visible lines, expose aggregate, or create an uneven finish. Cleaning should be consistent and controlled, not a race to use the highest setting possible.

Pavers and Hardscapes

Pavers are popular throughout St. Augustine because they add definition to patios, pool decks, walkways, and outdoor living areas. They can also collect sand, weeds, algae, and staining in the joints. Pressure washing can restore their appearance, but it must be done carefully to avoid blasting out joint sand or disturbing the base beneath the pavers.

A good cleaning plan may include a gentle surface wash, targeted treatment for organic growth, and re-sanding or sealing recommendations when needed. If pavers have heavy cooking grease near an outdoor kitchen, heated water may be useful. For normal seasonal buildup, controlled pressure washing is usually the practical choice.

Vinyl Siding, Painted Surfaces, and Stucco

These surfaces are where homeowners most often run into trouble with DIY washing. A strong stream can force water behind siding, strip paint, damage caulk, or leave scars in softer stucco finishes. In many cases, the safest method is low-pressure washing combined with a cleaning solution designed to address mildew and algae.

This is often called soft washing. It is not the same as blasting a wall with a pressure washer from a few feet away. The cleaning solution does much of the work, while a low-pressure rinse removes the loosened buildup. For exterior walls, the goal is a clean finish without creating a repair project.

Decks, Fences, and Wood Features

Wood can look refreshed after washing, but it is easy to damage. Too much pressure can fur up the grain, leave wand marks, splinter boards, and shorten the life of stain or paint. A lower-pressure process, appropriate cleaning product, and patient rinse are generally safer for wood fences, decks, and pergolas.

Power washing with hot water is rarely the first choice for residential wood. The material responds better to a careful, surface-specific process.

Roofs and Gutters

Roof cleaning should not involve high-pressure washing. Shingles, tiles, flashing, and roof coatings can be damaged when pressurized water is applied incorrectly. For black streaks, algae, or mildew on a roof, a low-pressure treatment is the appropriate route.

Gutters can benefit from exterior cleaning to remove streaks and mildew, while interior gutter cleaning focuses on leaves, pine needles, and drainage. These are separate problems that may require separate services.

Florida’s Climate Makes Method Matter

Northeast Florida homes deal with conditions that homeowners in drier climates may not see as often. Humidity encourages mildew. Summer storms carry pollen and debris. Shaded areas stay damp longer. Coastal air can leave residue on exterior surfaces, and irrigation overspray can create stubborn mineral marks or green growth along walls and walkways.

That means a driveway may look dirty again faster than expected if the underlying organic growth is only rinsed away rather than properly treated. It also means a patio near mature trees may need more frequent cleaning than a sunny, open concrete area.

Local experience helps set realistic expectations. Cleaning can make a major immediate difference in curb appeal, but the right maintenance schedule depends on shade, drainage, landscaping, irrigation patterns, tree cover, and how the space is used. There is no one-size-fits-all timeline for every property.

When Power Washing Is the Better Choice

Power washing is especially useful when the stain is oily, greasy, sticky, or heavily embedded. It can be a strong option for garage floors, heavily stained concrete, areas around grills, commercial-grade walkways, and surfaces exposed to automotive or equipment fluids.

Even then, the surface needs to be suitable for heat and pressure. A newer sealed concrete driveway and a weathered patio slab may call for different settings and products. The presence of grease does not mean every part of the property should receive hot-water treatment.

When Pressure Washing or Soft Washing Is Better

For routine residential exterior cleaning, pressure washing is usually the more common solution. Driveways, sidewalks, patios, pool decks, and many hardscape surfaces can respond well to the right pressure level and surface cleaner.

Soft washing is typically the safer choice for siding, stucco, painted trim, screens, roofs, and other vulnerable surfaces. It can also be more effective against algae because it treats the growth rather than relying only on force. The method matters more than the label on the truck.

The Risks of Choosing Based on Price Alone

Exterior cleaning is one of those services where the lowest quote can become expensive if the work is rushed or performed with the wrong equipment. Etched concrete, stripped paint, damaged window seals, displaced paver sand, and scarred wood are all preventable problems.

Before scheduling service, ask what surfaces will be cleaned, how the crew plans to treat algae or mildew, and whether the method will be adjusted for delicate materials. A dependable provider should be able to explain the process plainly. You should not have to guess whether a powerful stream of water is appropriate for your home.

A Cleaner Property Starts With the Right Approach

The choice between power washing and pressure washing is not about choosing the strongest option. It is about matching the cleaning method to the stain and the surface. For many St. Augustine homeowners, that means controlled pressure washing for hard surfaces and low-pressure cleaning for more delicate areas.

American Blade Lawn Care approaches exterior cleaning with the same practical attention given to lawns, irrigation, and landscaping: assess the property, use the right method, and leave the space looking cared for. A clean driveway, patio, or walkway does more than improve the view from the curb. It makes the entire outdoor space feel ready to enjoy again.

Concrete Versus Paver Driveway: Which Is Better?

Concrete Versus Paver Driveway: Which Is Better?

A driveway has to do more than get cars from the street to the garage. In Northeast Florida, it also has to stand up to punishing sun, sudden downpours, humidity, irrigation overspray, and the everyday wear of a busy home. When comparing a concrete versus paver driveway, the better choice comes down to your budget, drainage needs, maintenance expectations, and the look you want for your property.

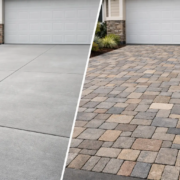
For many St. Augustine and Jacksonville homeowners, pavers are the stronger long-term option when curb appeal, repairability, and water management are priorities. Concrete can still be a smart, clean-looking choice for a straightforward driveway with a lower upfront price. The right answer depends on the condition of your site and how you plan to use the space.

Concrete Versus Paver Driveway: The Main Difference

A concrete driveway is poured as one continuous slab. Once it cures, it creates a solid, uniform surface that works well for many homes. It can be broom-finished for traction, stamped for more decorative appeal, or colored to better suit the exterior of the house.

A paver driveway is built from individual concrete, brick, or natural-stone units installed over a carefully prepared base. The pavers interlock, while edge restraints and joint sand help hold the surface in place. That layered construction takes more time and attention during installation, but it provides advantages that matter in Florida soil and weather conditions.

Concrete offers simplicity. Pavers offer flexibility. Neither material can make up for poor site preparation, however. A driveway that lacks a stable base, proper slope, and dependable drainage can settle, crack, or hold water no matter what surface is installed on top.

Upfront Cost and Long-Term Value

Concrete usually costs less upfront than a professionally installed paver driveway. It requires fewer individual materials and generally takes less labor to install. For homeowners who need a functional replacement without adding a major design feature, concrete can be a practical fit.

Pavers typically have a higher initial investment because the installation requires excavation, grading, compacted base material, bedding sand, edge restraints, and detailed placement of each unit. Patterns, borders, multiple colors, curves, and larger driveway layouts can also add to the price.

The long-term value calculation is different. A cracked concrete slab may require patching, resurfacing, or replacement of a large section to restore its appearance. With pavers, a damaged or stained area can often be lifted and repaired one section at a time. That can help protect the investment when settling, plumbing work, tree roots, or a future irrigation repair affects part of the driveway.

For a home where appearance plays a major role in resale value or neighborhood curb appeal, pavers often deliver a more noticeable visual return. A well-designed paver driveway can tie together the front walk, landscape beds, entryway, and outdoor living areas in a way plain concrete rarely does.

How Florida Weather Affects Each Material

Florida heat, moisture, and heavy rain make drainage and movement major considerations. Concrete expands and contracts as temperatures change. Control joints are installed to manage that movement, but concrete can still crack over time. Small cracks may be mostly cosmetic, while larger cracks, uneven sections, or sinking areas can become safety and drainage concerns.

Pavers are designed as a flexible system. The joints between them allow for minor movement without creating one large visible crack across the surface. If the base is properly compacted and the edges are secured, pavers can handle normal settling well.

Water is another reason to look closely at the site before choosing. A driveway should direct runoff away from the home, garage, and low areas of the yard. Pavers can be installed with drainage-friendly planning in mind, and permeable paver systems may be appropriate for properties that need improved stormwater management. Standard pavers are not automatically permeable, so the design and base materials matter.

Concrete sheds water across its surface when it is correctly sloped. That can work well, but a low spot or improper pitch may leave standing water after a summer storm. Pooling water can stain the surface, encourage algae growth, and create a slippery area near the garage or front entry.

Appearance and Design Flexibility

This is where pavers have a clear advantage. They are available in many shapes, colors, textures, and laying patterns. A driveway can have a simple, traditional pattern or a more custom design with a contrasting border. Pavers also work naturally with walkways, patios, retaining walls, and landscape beds, helping the entire front yard feel intentional rather than pieced together.

Concrete has come a long way from basic gray slabs. Decorative finishes, stamping, and color can give it a more finished appearance. Still, many homeowners prefer the depth and detail of individual pavers, especially on Spanish, coastal, Mediterranean, and newer Florida-style homes.

There is a practical side to appearance as well. Concrete stains can be difficult to hide, particularly from rust, leaf tannins, oil, fertilizer, or irrigation water with high mineral content. Pavers can stain too, but replacing a few affected units is often easier than trying to blend a concrete repair into an existing slab.

Maintenance Needs for Concrete and Pavers

Both driveway types benefit from routine care. Power washing helps remove algae, mildew, dirt, and tire marks that build up in Florida’s humid environment. Keeping nearby irrigation heads aimed away from the driveway can also reduce mineral staining and overspray.

Concrete may need periodic sealing, especially if it is decorative or stained. Sealing can help reduce surface staining and moisture intrusion, but it does not prevent cracking caused by settling or structural movement. Avoid harsh de-icing products if you have vehicles returning from trips to colder states, since chemical residue can damage concrete over time.

Paver driveways may need joint sand refreshed periodically. Over time, rain, cleaning, and normal traffic can reduce the sand between pavers. Polymeric sand can help lock joints together and discourage weed growth when installed correctly. Some paver driveways are also sealed to enhance color and make cleaning easier, though sealing is optional and should be selected carefully to avoid an overly slick finish.

Weeds between pavers are often a sign that debris and seeds have collected in the joints, not that weeds are growing up from below. Regular cleaning and proper joint-sand maintenance make a big difference. If a paver section begins to dip, addressing it early is far easier than waiting until the base has washed out further.

Repairs: Where Pavers Often Win

A single concrete crack can be frustrating because repairs rarely disappear completely. Even a well-done patch may differ in color and texture from the surrounding slab. If a section has settled badly, contractors may need to remove and repour a substantial area.

Pavers make localized repairs more manageable. A crew can remove individual pavers, correct the base, replace damaged pieces if needed, and reinstall the surface. This is especially useful when access is needed for underground utility lines, irrigation repairs, or drainage work.

That advantage depends on having extra pavers available. If you choose pavers, save a small number from the original installation. Manufacturers can change colors or discontinue styles, and stored pavers make future repairs easier to match.

Which Driveway Is Right for Your Home?

Choose concrete when you want a clean, dependable driveway at a lower initial cost and do not need extensive decorative detail. It can be an excellent solution for a simple rectangular driveway on stable ground with good drainage.

Choose pavers when you want stronger curb appeal, more design options, and the ability to repair smaller areas without replacing a full slab. They are particularly worth considering for properties with drainage challenges, homes with a detailed landscape plan, or driveways that need to make a strong first impression.

Before making a final decision, have the property evaluated for slope, runoff, soil condition, vehicle use, and the relationship between the driveway and your landscape beds. A beautiful driveway should not send water toward the foundation, damage your lawn, or create a maintenance headache around the front of the home.

A driveway upgrade is also a good time to improve the full exterior picture. Fresh edging, clean mulch beds, healthy turf, properly aimed irrigation, and a maintained hardscape can make the property look cared for from the moment someone pulls up. American Blade Lawn Care can help homeowners plan exterior improvements that fit the way their yard performs in the Florida climate, not just the way it looks on installation day.

The best driveway is the one that suits your home, drains correctly, and still looks good after years of Florida sun and summer rain.

10 Signs of Irrigation Failure in Florida Yards

10 Signs of Irrigation Failure in Florida Yards

A St. Augustine lawn can look fine on Friday and stressed by Monday, especially when heat, sandy soil, and afternoon rain all pull your irrigation system in different directions. Knowing the signs of irrigation failure helps you catch a small sprinkler issue before it turns into brown turf, wasted water, muddy beds, or an expensive landscape repair.

Signs of Irrigation Failure to Watch For

1. Dry, brown, or thinning patches in the lawn

One of the clearest warning signs is a patch of grass that turns dull, gray-green, or brown while the rest of the lawn stays healthy. In Northeast Florida, this often points to a sprinkler head that is clogged, tilted, blocked by grass, or simply not reaching the area it should.

Do not assume every brown patch means the grass needs more water. Chinch bugs, disease, compacted soil, and shade can cause similar damage. The key question is whether the problem follows the shape of a sprinkler zone. A dry wedge near the edge of the yard or a strip along a fence line often means poor coverage, not a lawn-wide health problem.

2. Water pooling near sprinkler heads or walkways

Standing water after a cycle is not always a sign that the system is working well. A puddle around one sprinkler head may mean the head is cracked, its seal is failing, or the nozzle is sending water too close to the ground. Water collecting along a sidewalk, driveway, or patio can also signal a broken line underground.

Besides wasting water, pooling can soften the soil around turf roots and create muddy areas that are hard to mow. It can also send runoff onto hard surfaces, where it carries fertilizer, mulch, and debris toward storm drains. In a Florida yard, drainage and irrigation need to work together.

3. A sprinkler head will not pop up or retract

Sprinkler heads sit low to stay out of the way of mowing and foot traffic. Over time, sand, grass clippings, mulch, and shifting soil can keep one from rising properly. If a head does not pop up, water may spray into the surrounding grass instead of over it.

A head that stays up after the cycle ends deserves attention too. It is easy to hit with a mower, and even a small impact can break the fitting or affect the spray pattern. This is a straightforward repair in many cases, but leaving it alone can lead to a larger leak.

4. Sprinklers spray the street, siding, or driveway

Irrigation should support your lawn and landscape beds, not water concrete, cars, windows, or the side of the house. Overspray is often caused by a misaligned nozzle, a damaged head, too much pressure, or a head that has been pushed out of position.

This is more than a curb appeal issue. Constant water against siding can encourage mildew and staining. Overspray on driveways and sidewalks can leave rust-colored irrigation stains, particularly when water contains iron. It also raises your water bill without giving your turf any benefit.

5. One zone has weak pressure or uneven spray

When some heads in a zone barely spray while others mist or blast water, the system may have a pressure problem. A leak in the line, a partially closed valve, a clogged nozzle, or too many heads on one zone can all create uneven performance.

A misty spray is a common clue that pressure is too high. Fine mist blows away in the wind before it reaches the root zone. Weak streams, on the other hand, can leave dry pockets across the lawn. Both problems create uneven watering, which makes it harder to maintain consistent grass color and growth.

6. Your water bill jumps without a clear reason

A sudden increase in water use is one of the most expensive signs of irrigation failure. It may be a visible leak, but underground leaks are often harder to spot. You may notice a soggy spot in the yard, unusually green grass in one small area, soil that stays soft, or water running from a low point long after the system has shut off.

If your bill rises during a hot, dry stretch, some increase may be normal. But a major change without an adjustment to your watering schedule is worth investigating promptly. A small underground leak can waste a surprising amount of water over several weeks.

7. The controller runs at the wrong time or skips zones

Sometimes the sprinklers themselves are fine, but the controller is not. A power outage, worn backup battery, outdated programming, faulty wiring, or a damaged rain sensor can cause a system to run at odd times, skip a zone, or water far longer than needed.

Homeowners often discover this when they hear sprinklers running in the middle of a rainstorm or notice one section of the yard has been dry for days. Seasonal adjustments matter in St. Augustine. A schedule that worked during a dry spring may be excessive during a rainy summer, while a winter schedule may not support the lawn during a warm, windy stretch.

8. Landscape beds are soaked while the lawn is dry

Mulch beds, hedges, palms, and turf do not always need the same amount of water. When a mixed zone waters everything on one schedule, you may see wet mulch, stressed shrubs, or dry grass all at once. This may not be a broken part, but it is still an irrigation design or adjustment problem that affects the health of your landscape.

Overwatered beds can promote fungal issues and wash mulch out of place. Underwatered turf may thin out and invite weeds. A system should be adjusted around the specific needs of your grass, plants, soil, sun exposure, and drainage conditions.

9. You hear hissing, bubbling, or water running after shutoff

Your irrigation system should be quiet once a zone finishes. A persistent hissing sound, bubbling near a valve box, or the sound of running water after the cycle may indicate a valve that is not closing fully or a leak in the supply line.

Check the area carefully without digging into pipes or wiring. If the soil is unusually wet, water is surfacing, or the sound continues, professional inspection is the safer choice. Finding the exact source early can prevent damage to roots, hardscape edges, and nearby utility areas.

10. Your lawn needs constant extra watering to stay green

If you regularly hand-water areas that should be covered by sprinklers, the system is not doing its job. That does not automatically mean you need a complete replacement. A nozzle change, head adjustment, coverage correction, valve repair, or controller update may be enough.

The right fix depends on the yard. Older systems may need more substantial work, especially after landscaping changes, new patios, tree growth, or years of settling soil. A system installed for an open lawn may no longer provide proper coverage once hedges, palms, and beds have matured.

What to Do When You Notice Irrigation Problems

Run each irrigation zone during daylight at least once every few weeks. Walk the property while it operates and look for dry gaps, overspray, low heads, leaks, and unusual runoff. This simple check is the fastest way to spot a problem before your lawn begins showing stress.

Avoid turning up the timer just because the grass looks dry. More runtime will not fix a broken head, a hidden leak, or poor coverage. It can make drainage problems worse and encourage shallow roots. Start by identifying whether the issue is mechanical, programming-related, or connected to lawn health.

For homeowners who want a dependable answer without the guesswork, American Blade Lawn Care can evaluate irrigation performance alongside the condition of the lawn and landscape. That matters because the best repair is not just the one that gets water flowing again. It is the one that delivers the right amount of water where your Florida yard actually needs it.

A healthy lawn should not depend on crossed fingers every time the sprinklers turn on. If one area is dry, another is flooded, or your water use suddenly climbs, schedule a repair assessment before a manageable issue becomes visible damage across the yard.